


The Allevi Team is the unit of organization for Allevi software accounts and product access. Below we discuss what an Allevi Team is, how it works, and how to use one with your research group.
The Allevi Team is the main organization for your Allevi products, files, and accounts.
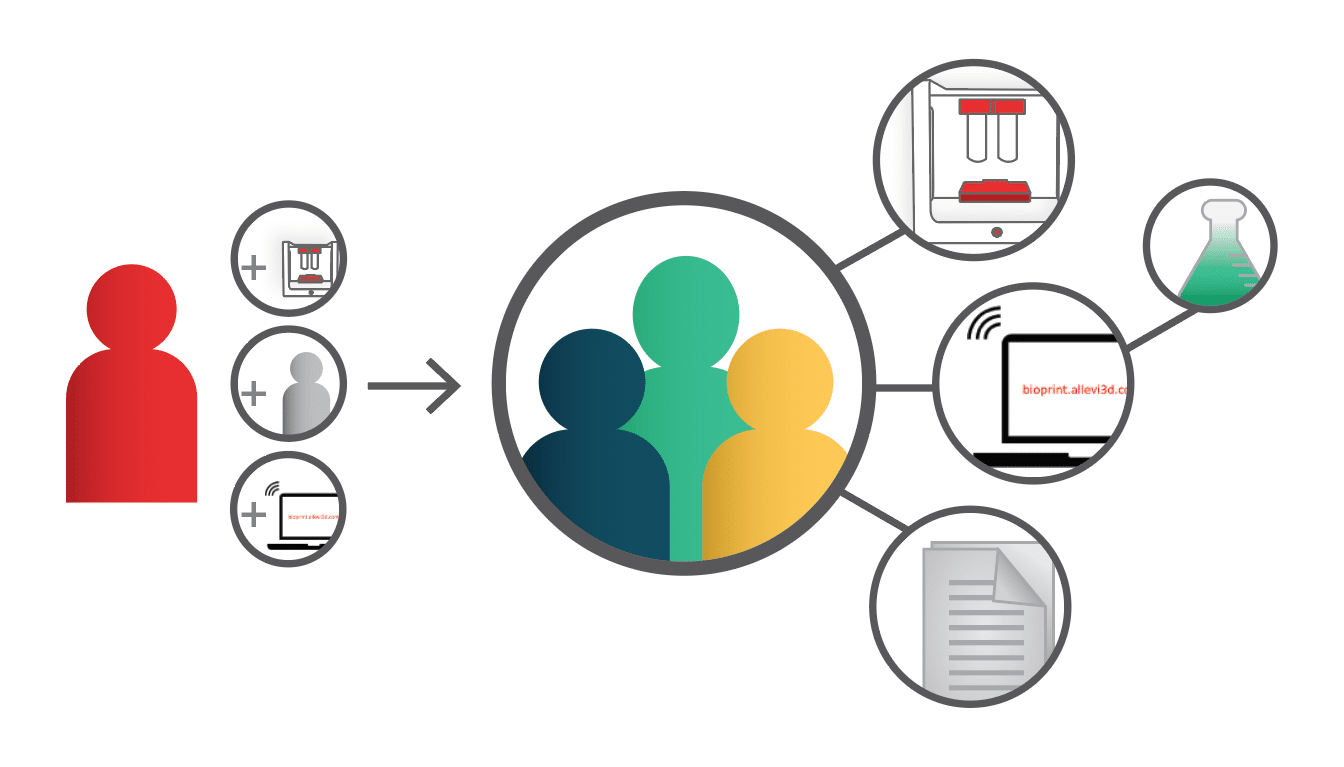
An administrator can create a Team and then add users, printers, and software upgrades to the Team. All users in the Team will have access to the printers and any software upgrades in that Team provided by the administrator. They will also share access to files uploaded to the Allevi Software by the Team members.
In the absence of a team, a user will default to working from their Personal Account. Users can easily switch between their Personal Account and any of their Teams.
A user’s active Account or Team is displayed under their profile icon in the software header. The software will default to placing the user in their Personal Account at first. A list of their available Accounts and Teams can be toggled with the blue arrows button.
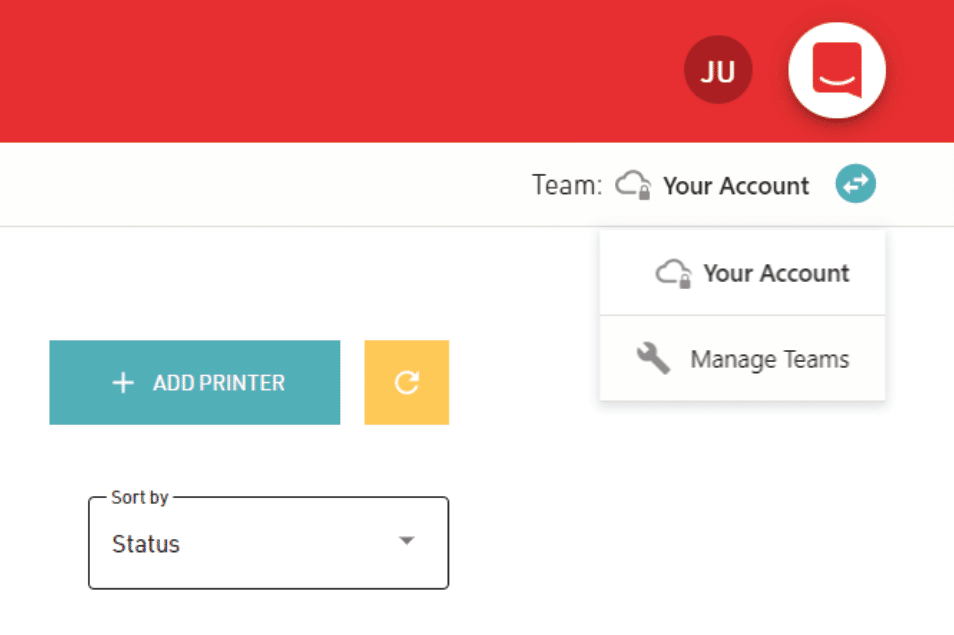
Clicking ‘Your Account’ in this list brings the user to their Account Management page.
Here, the status of ‘Your Account’ is active, meaning it is currently in use. Next, go into your ‘Printers’ list to see what printers your account has access to.

Use the red (-) button to the right of the printer to remove it from your account. Once you create a team, you can add the printer to your new team using your printer serial number.

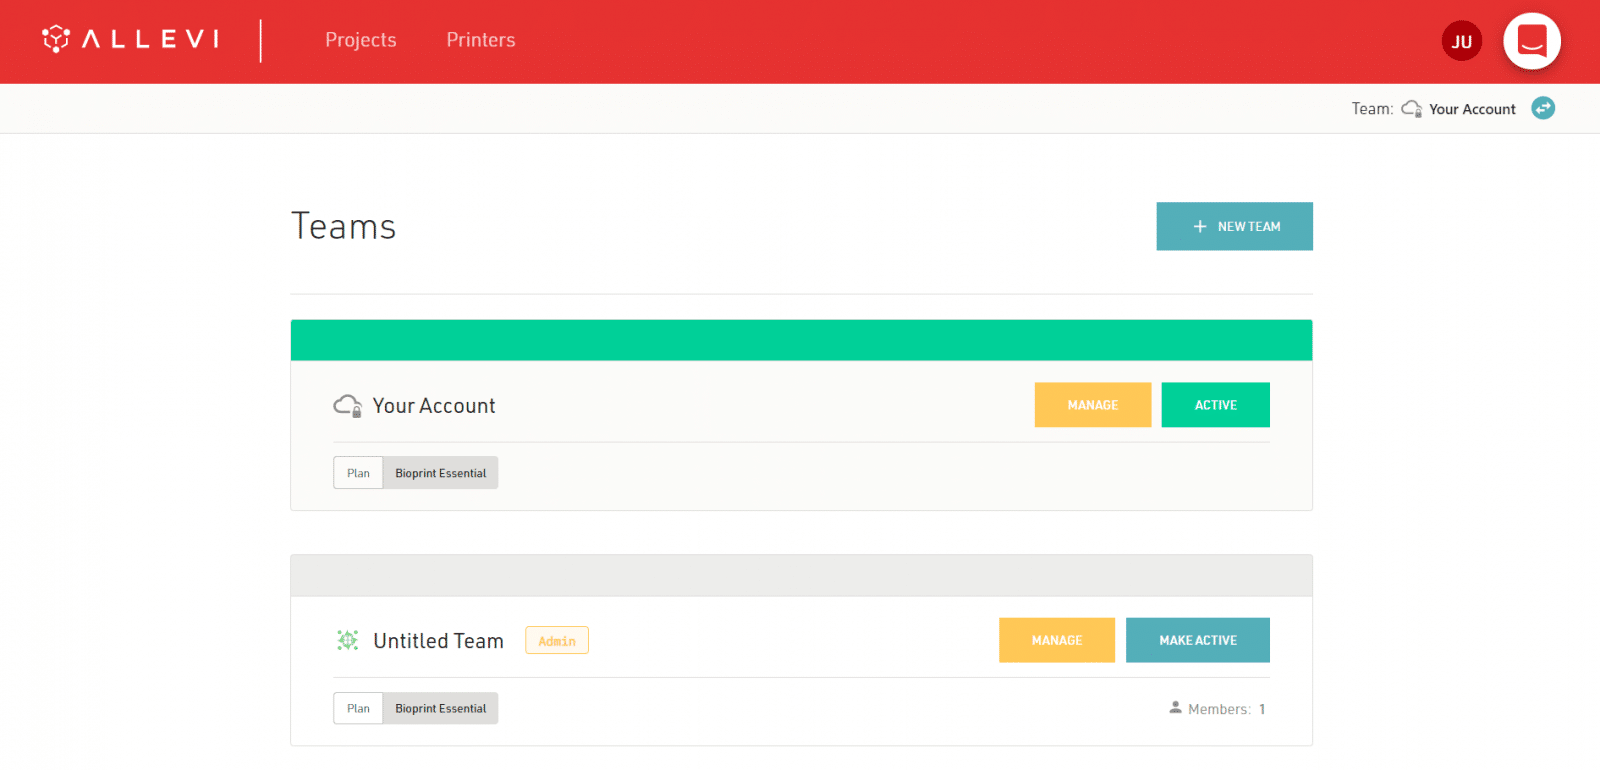
Clicking ‘Manage Teams’ opens the Teams List.
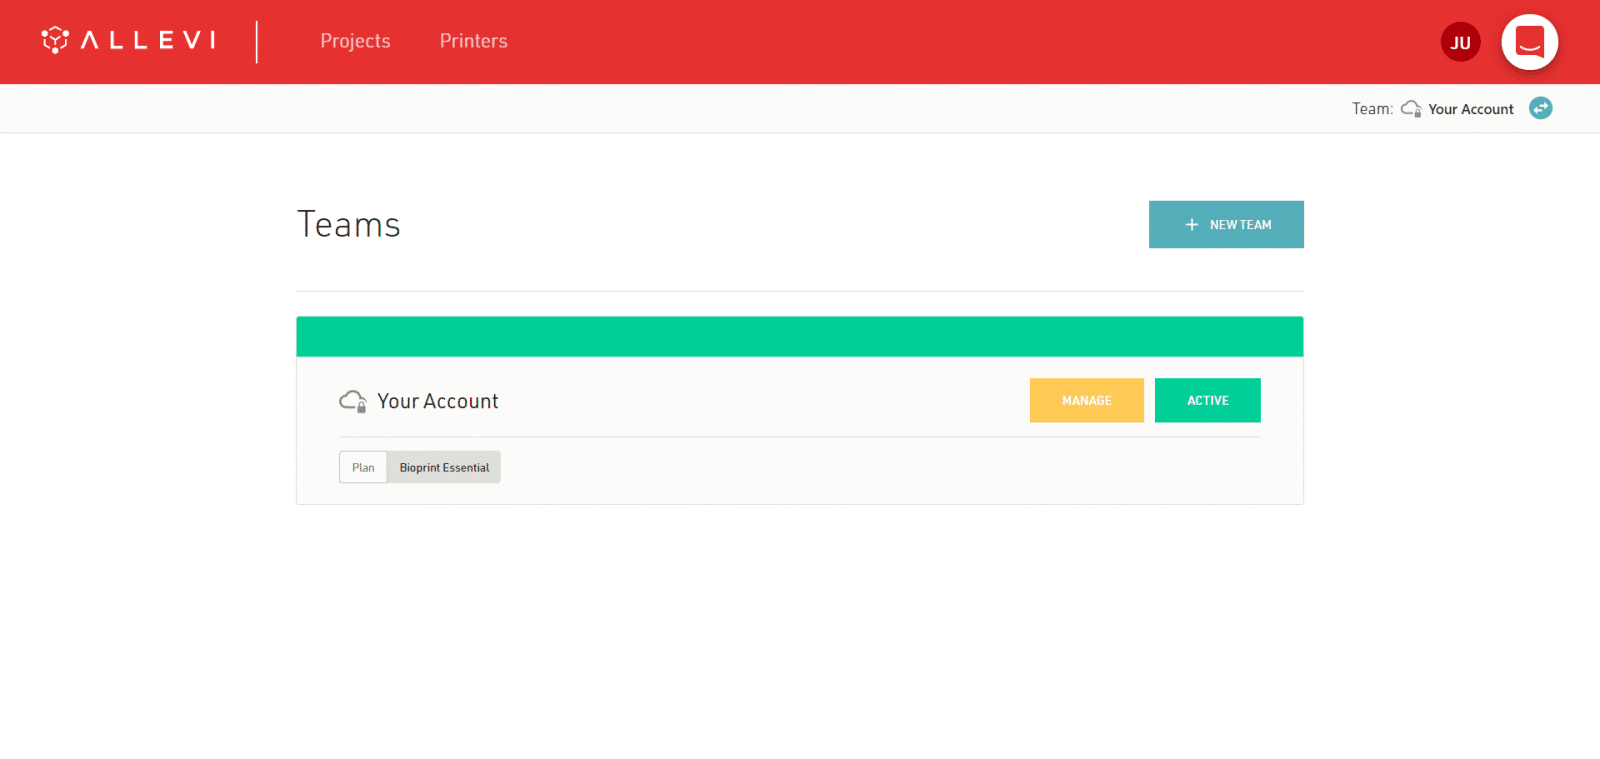
Similar to the Printer List, the Teams List displays all Teams the user currently has access to and lets the user add a new Team. The Green bar across the top of ‘Your Account’ indicates that this option is active. The software plan for ‘Your Account’ is listed below the Account name, and there are management and activation buttons to the right.
Clicking the New Team button lets the user name and create a new Team. A green check mark displays when creation is successful.
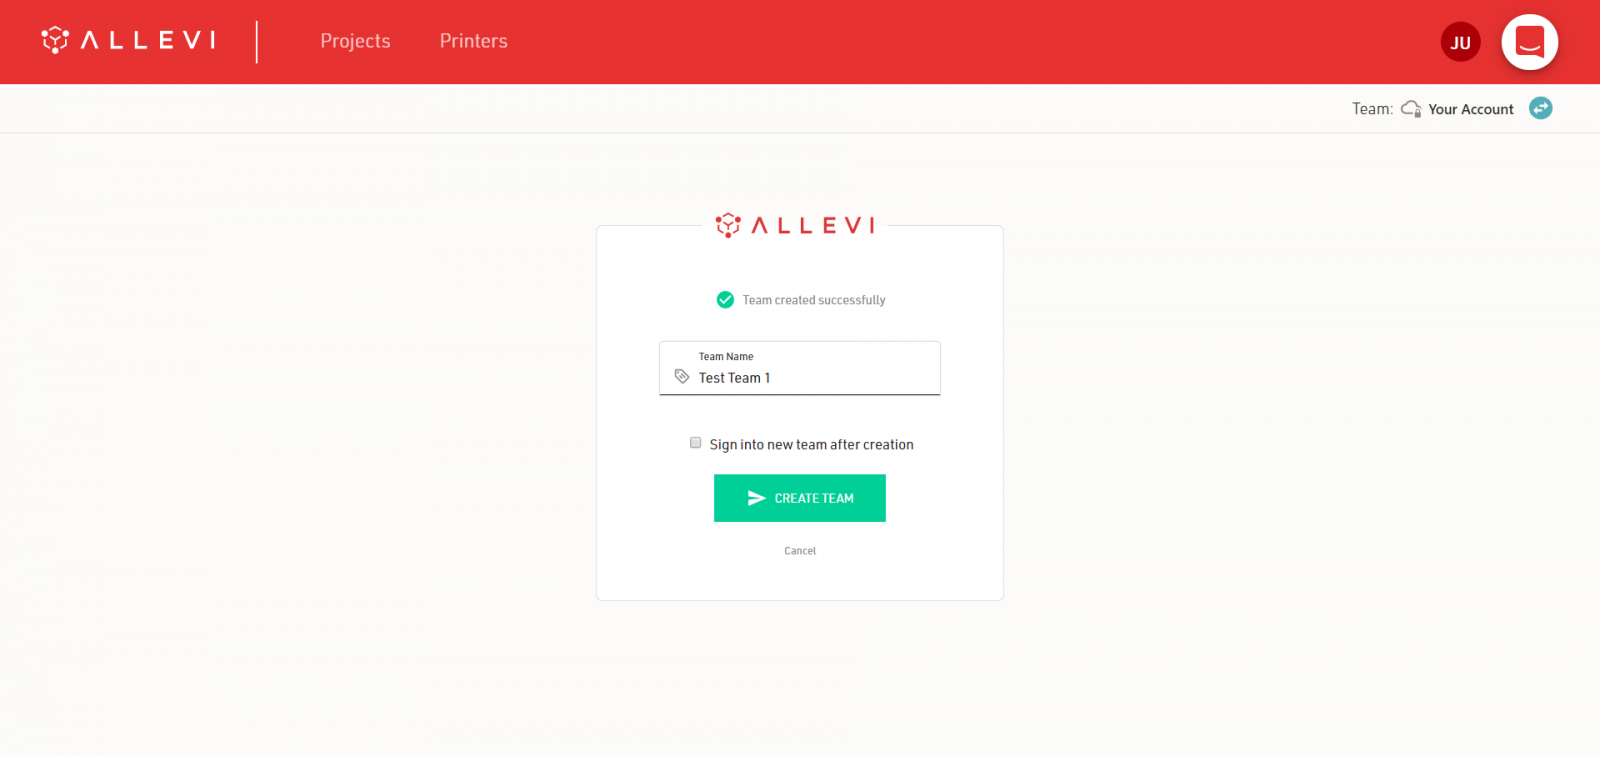
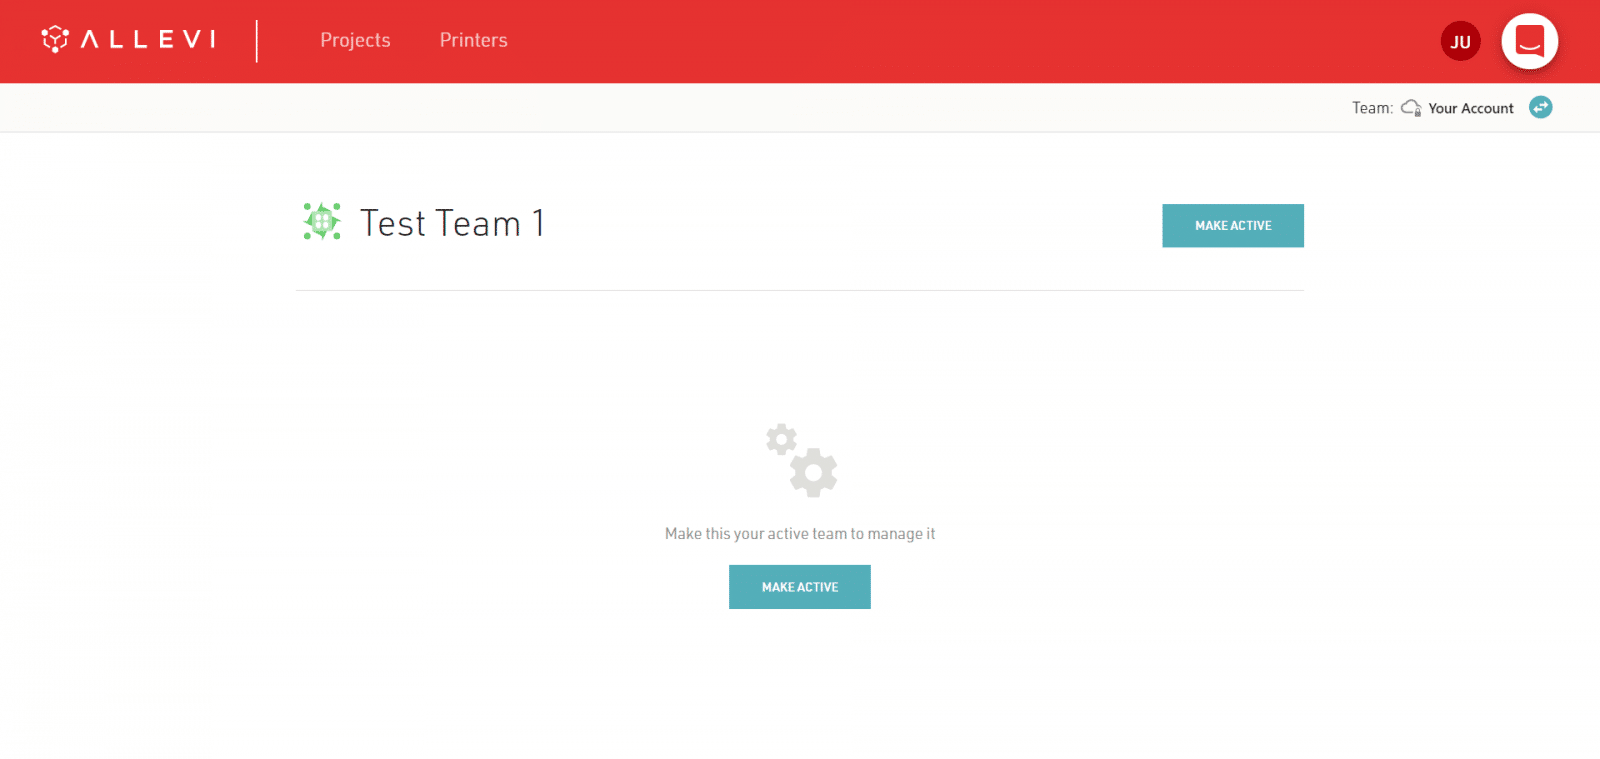
The Teams List will then feature the new Team! New Teams will start with just one member (the user that just created it) and default to inactive (unless they check the sign in box during creation). Since the user created the team, they will be designated the administrator (Admin) by default. Their Admin status is reflected by the Admin tag beside the Team Name.
Clicking the Manage button beside a Team name in the Team list opens the Team Management page. At first, the new Team will be inactive. To start making changes, the user will need to activate the Team with the Make Active button.
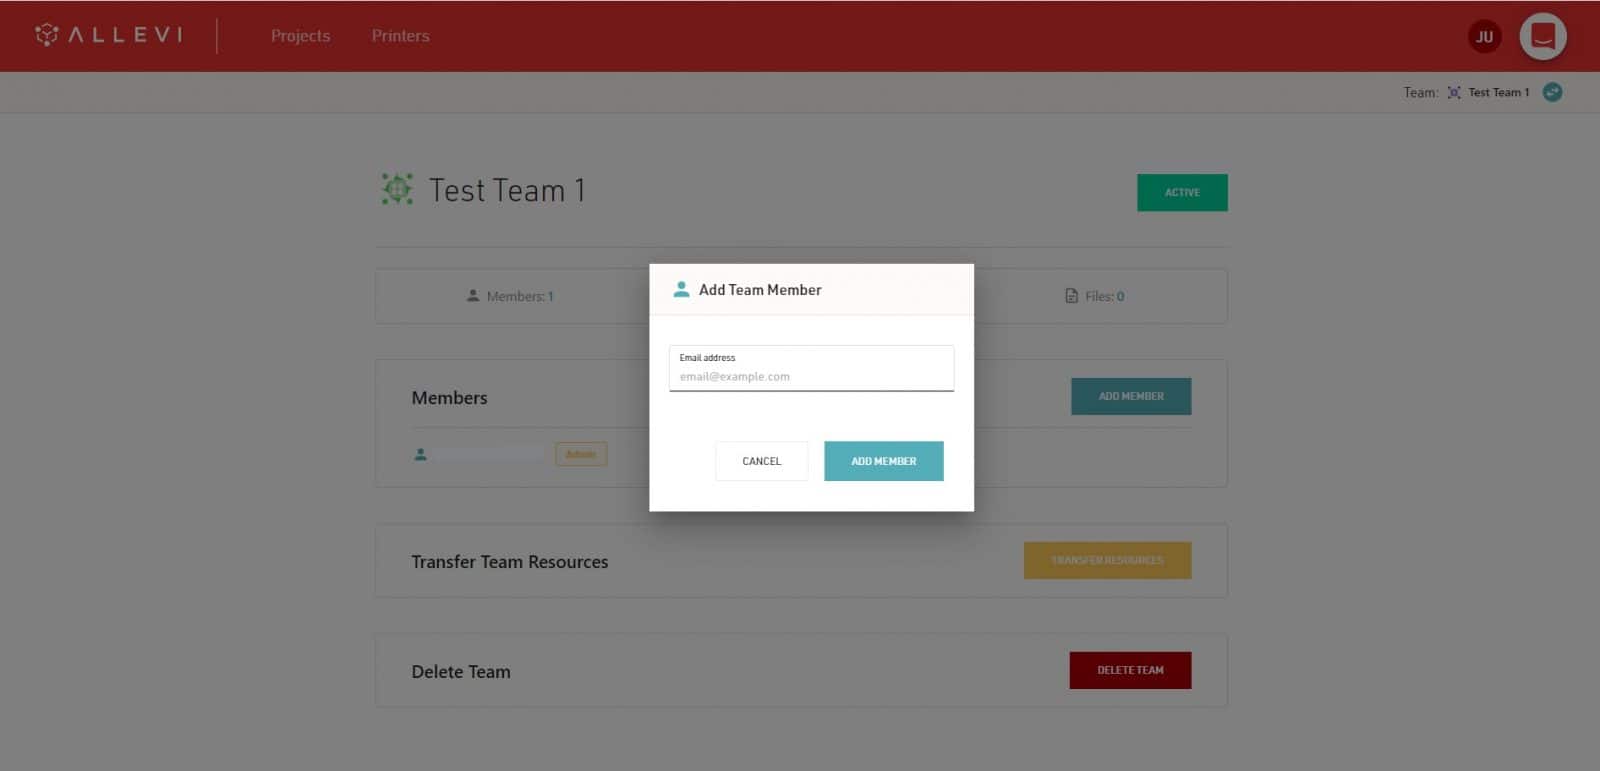
The Team Management page is very similar to the Account Management page with an Active status button and shared resources dashboard. The Team Management page also includes a count of members in the resources dash, a list of the Team Members with an Add Member button, and a Delete Team button.

To add another user to a Team, the admin should enter the email address associated with their Allevi Bioprint account. The owner of that account will be sent an email notifying them of their new access. This new member will be able to activate the Team from their view of the software. Activating the Team grants access to its resources. Please note that the email address is case sensitive and must be entered exactly in the same way that was used to create the Allevi Bioprint account. For example if the email used to create the Allevi Bioprint account was entered as [email protected] you must not use [email protected] to add the team member or you will receive an error that that email is not associated with an Allevi Bioprint account.
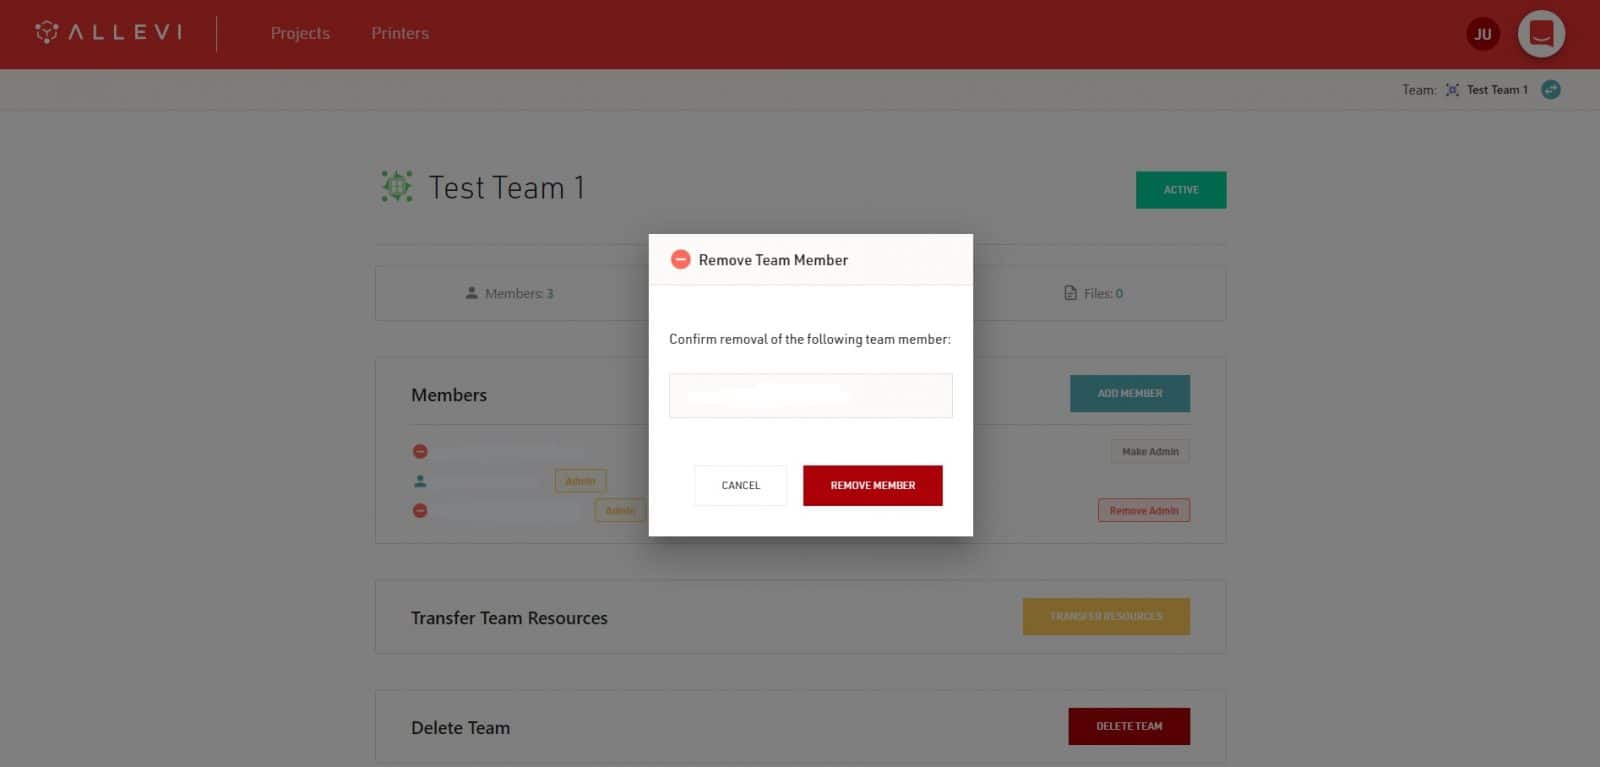
The new members of the Team appear in the Members list. The red minus button (-) can be used to remove members while the Make Admin button can grant Admin privileges to another member of the Team.
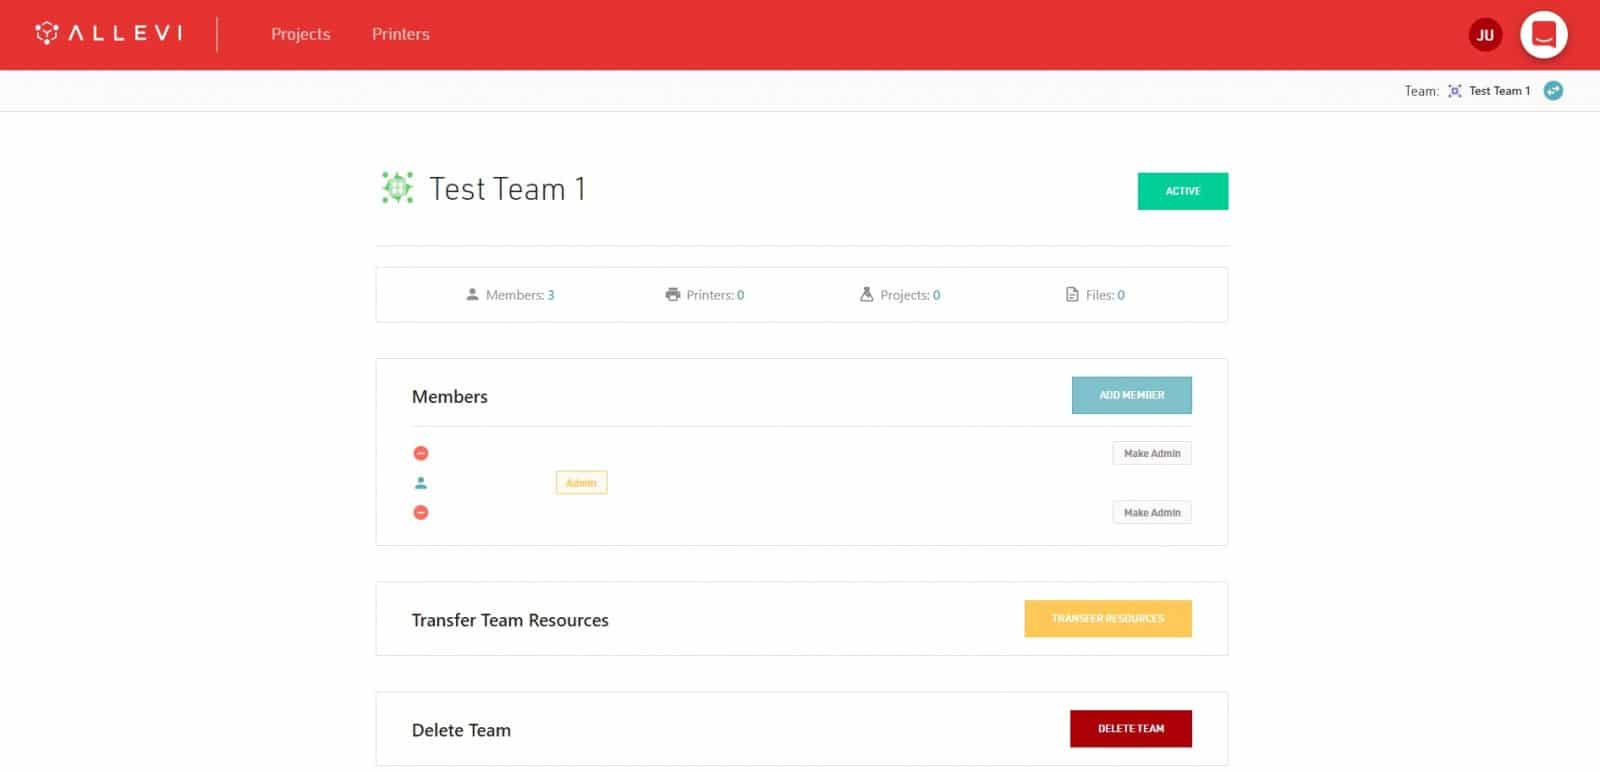
When removing a Team member, an Admin will be prompted with the email associated with the member being removed. This Team member can be added again later but upon removal, they will lose access to the Team’s shared resources. The removed user’s software will activate another Team or their Personal Account.
A Team Admin can transfer the Team’s shared resources to another Team or Account by selecting the alternate account and using the Transfer Resources Button from the window.
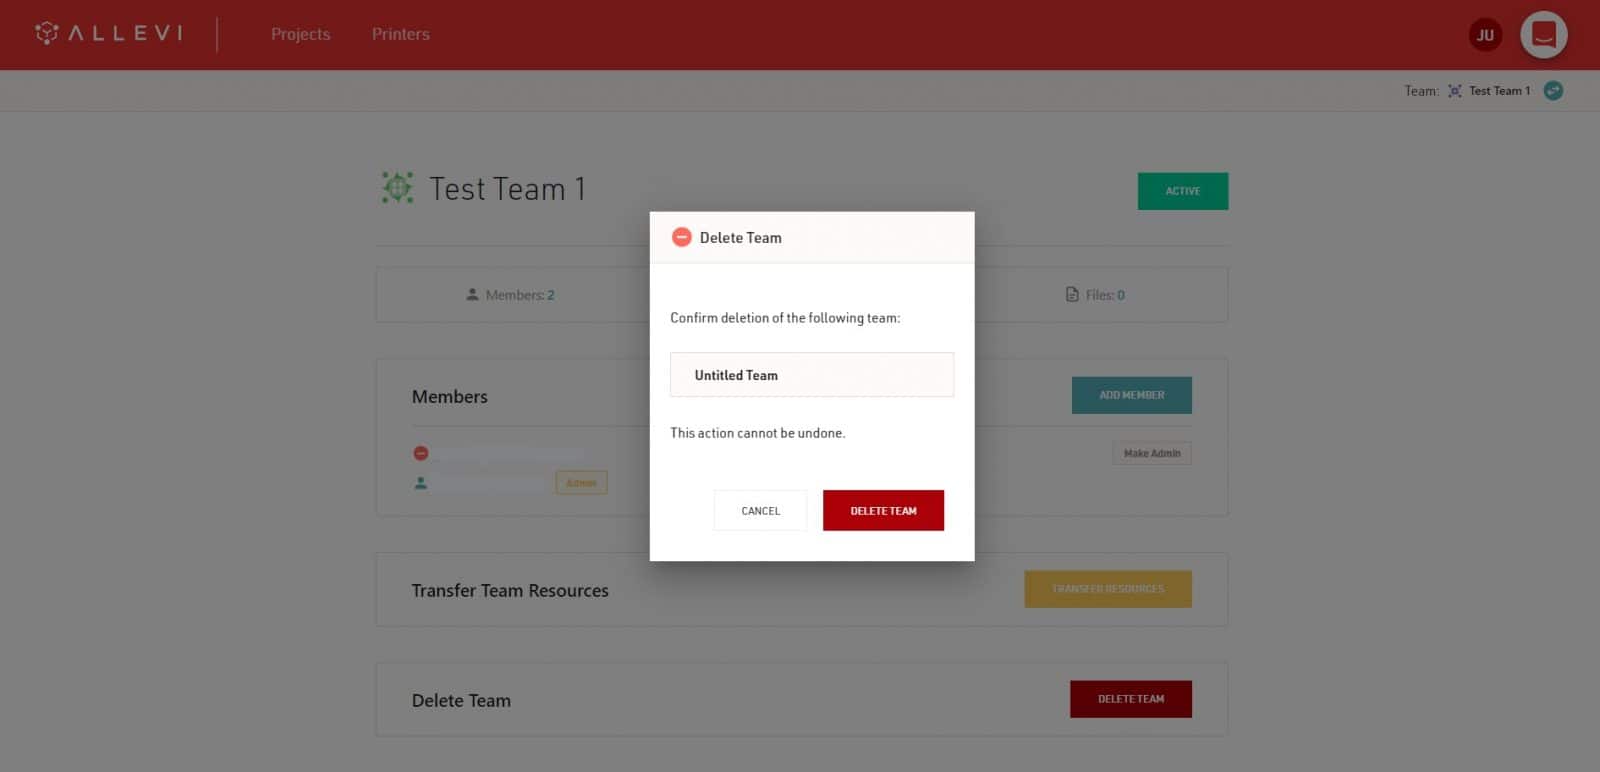
The Team can also be deleted using the Delete Team button at the bottom of the Team Management page.
For more on the rest of the software, check out our Complete Guide to Allevi Bioprint Online.
Go for it! Teams are part of Allevi Essential and are available to all Allevi users. You can follow the Team creation and management steps above. Note that transferring resources from your Personal Account to a Team will move all of the resources from your Personal Account (not just a printer, for example).


