


Calibrating a 3D printer can be time-consuming and frustrating. That’s why Allevi introduced autocalibration for Allevi 1’s and Allevi 3’s. Below, we discuss how autocalibration works, important details to keep in mind, and some troubleshooting steps to get you autocalibrating again quickly!
On an Allevi bioprinter calibration refers to the process of determining the point of material extrusion. This is required for determining an accurate (0,0,0) position which is vital for achieving an accurate print. Autocalibration, therefore, is the process by which the printer determines the point of extrusion on its own.
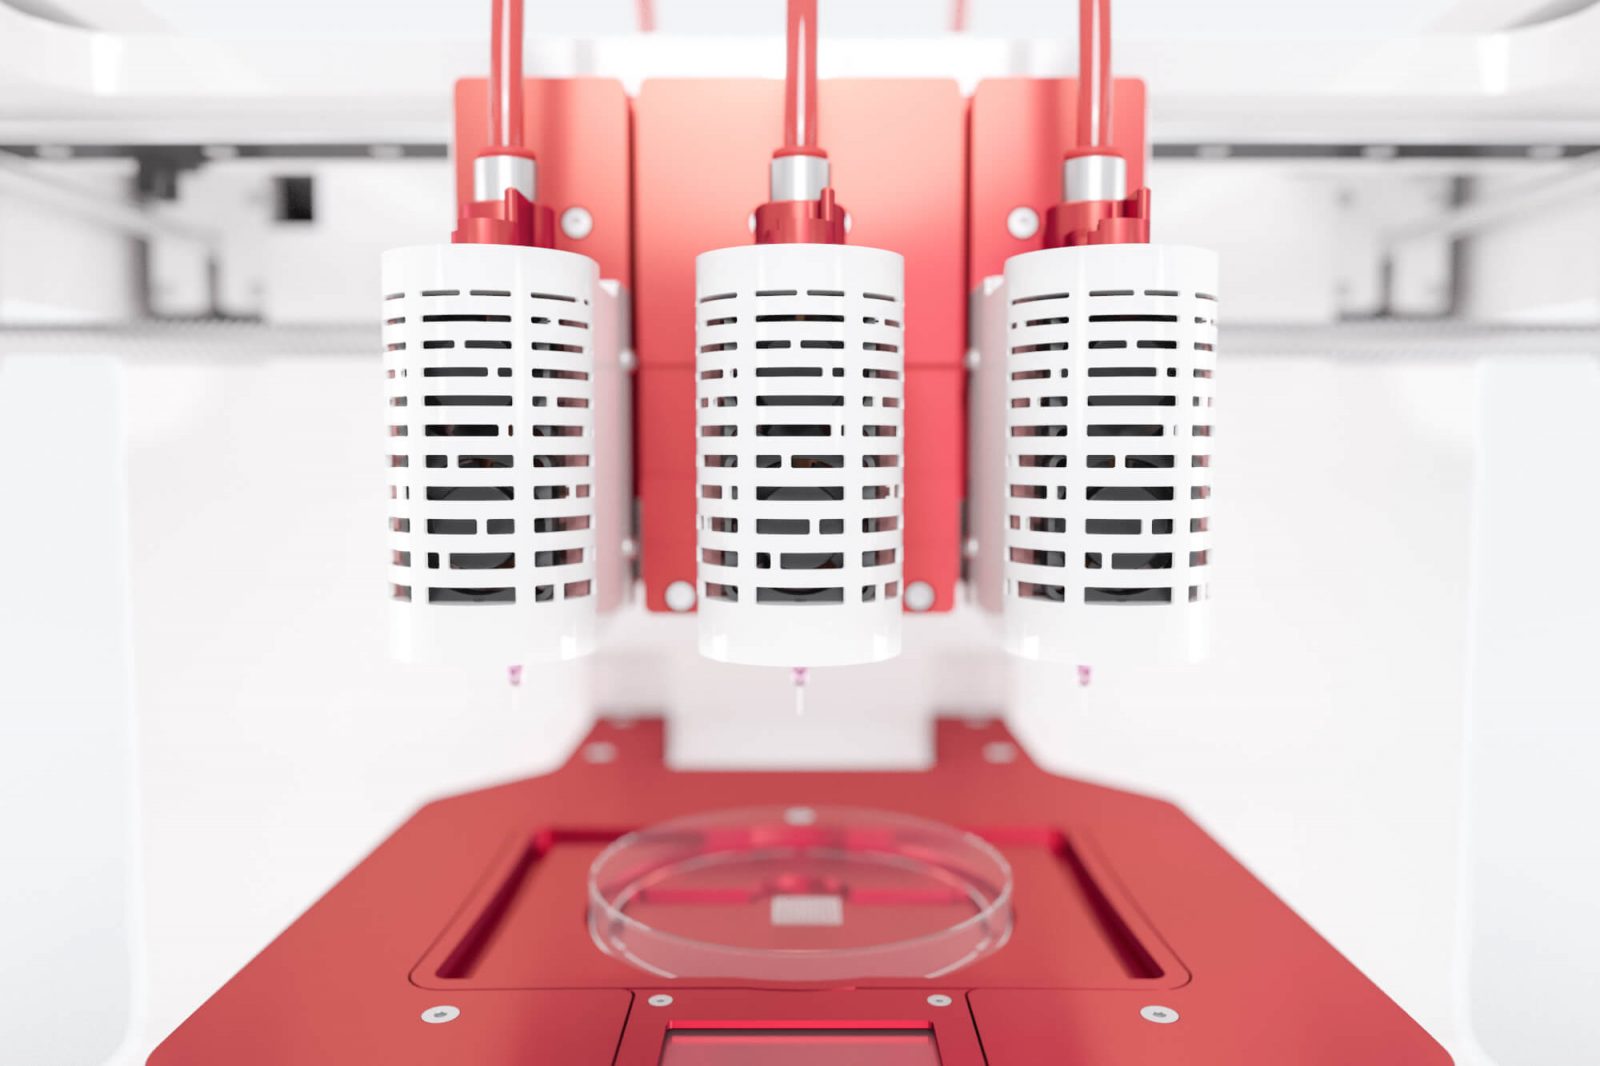
The first step in an autocalibration is launching the process from the Allevi Bioprint Online Software. For more details on the software, check out our Complete Guide to Allevi Bioprint Online. Once an autocalibration has been launched, the stage lights turn on with a yellow-orange color. The Status section of the software will also update to show that the printer is autocalibrating. Several of the user interface buttons will become temporarily unavailable as the printer works through the process. If at any time during autocalibration you want to immediately stop the printer turn it off with the power button.
With the autocalibration process under way, the printer has to determine the location of the extruder it’s calibrating. The printer will home the extruder in the X/Y plane and it will home the bedplate in the Z axis. After homing, the printer can calculate the location of the extruder relative to the frame. It can also determine the X and Y positions of the extrusion point because this point is centered under the syringe cavity of the extruder. However, the printer still hasn’t determined the exact Z position of the extrusion point. This is because the Allevi 1 and Allevi 3 are open systems which allow for syringe tips of different lengths.
The next step is to pinpoint that extrusion point using the touchpad on the bedplate. The printer begins by positioning the extruder over the touchpad on the bedplate in the X and Y axes. It will then begin raising the bedplate toward the extruder. The tip on the syringe in the extruder will contact the touchpad and then the bedplate will pause. The touchpad can only register a solid object with a small cross section during this process. It is very important to make sure you have a syringe, with a syringe tip attached to it, firmly inserted in the extruder you are calibrating before starting! When the touchpad is activated by a syringe tip, the printer records the Z position.
Once that Z coordinate is recorded, the stage light will turn off and the bedplate will descend partially. The printer will return to an ‘Idle’ status. Now the printer can determine the X, Y, and Z coordinates of the extrusion point. Given information about the printing surface, it can also determine how to position the extruder to achieve an accurate (0,0,0) point for a print.
One of the most important details in any calibration is the print surface you want to use. We include several build surface types with specific model numbers in Allevi Bioprint Online. This is because your Allevi bioprinter uses the manufacturer specified dimensions of each build surface when calculating the (0,0,0) position from the calibration data.
For example, we included the Corning Falcon 353003 (sometimes part of the Corning Costar line regionally) as our selection for petri dishes with the Allevi 1 and Allevi 3. The printer can place the (0,0,0) point on that dish’s surface, in the center, based on it’s specific thickness, diameter, etc. If you want to use a different type of print surface, see the Resetting Autocalibration Height section below.
It is also helpful to consider how calibration differs for a multiple well plate. The autocalibration process is the same for any print surface, but the interpretation of the data varies. The Allevi slicer treats each well in a multiple well plate as an individual print environment. As such, the printer will assign each well it’s own (0,0,0) point in the process of printing. The difference between each of these (0,0,0) points is determined through the calibration data and the manufacturer specified dimensions for the given print surface. If you were to use the zeroing buttons to move an autocalibrated extruder to the first (0,0,0) position before a print starts, it would move to the first well’s (0,0,0) position. The first well is in the furthest left column, in the row furthest from the front of the printer.
P852 exactly with an uppercase “P” and no spaces. Send the command.C119 but do not enter it yet. Use an uppercase “C” and no spaces.C119 command.If you are using an Allevi 1 or an Allevi 3, you may want to alter your printer’s autocalibration settings.
M428. The ‘M’ should be uppercase and there are no spaces. Carefully enter M428 exactly and nothing else.The M428 command takes the difference between the original autocalibration height and the current extruder height to adjust the z-offset for all future autocalibrations. Note that this change affects autocalibration for all types of build surfaces as well. You can always change the settings again by following this protocol.
Joe wants to start using a petri dish with a thin layer of PDMS coating the base for all of his upcoming experiments. To avoid having to manually calibrate for these altered dishes in every printing session, he decides to change his autocalibration height. First, he starts to run this protocol and positions his extruder. He notices that the current z-axis coordinate in the position section is 0.20 mm, the height of the PDMS layer. Joe then finishes the protocol. His autocalibrations for petri dishes are now positioned perfectly over the modified PDMS dishes, 0.20mm higher than they would have been. If he were to try to use a 6-well plate, autocalibration would also be 0.20mm higher than the usual 6-well setting.
If you have any further questions, contact the Allevi Support Team by email at [email protected].


