How to Optimize a Custom Bioink for Printability and Viability
- Updated on March 6, 2020
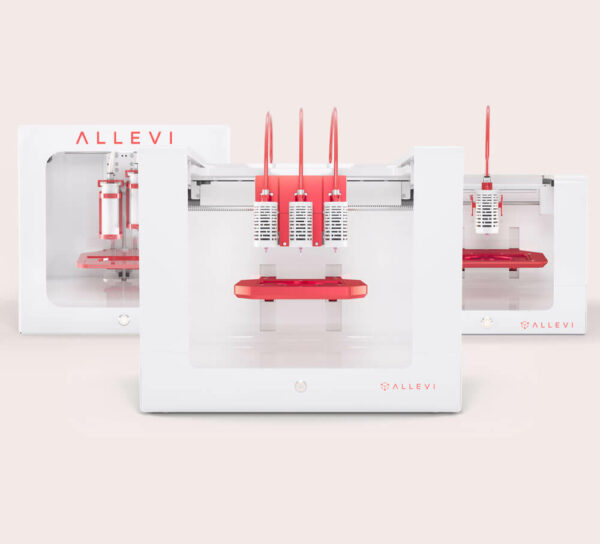
Allevi bioprinters are built for versatility and are capable of bioprinting with a wide array of bioinks and cells types. In addition to pre-optimized biomaterials, many users also use their own custom bioinks with their Allevi bioprinter. Below is an overview of how to optimize custom bioinks used by the research team at Allevi. This general development process can be followed when developing a new material for use with the Allevi 1, Allevi 2, or Allevi 3. Bioink development is split into two processes: viability testing and print parameters. These processes are completed in parallel to determine print parameters and develop a bioprinting control for future studies with your new material.
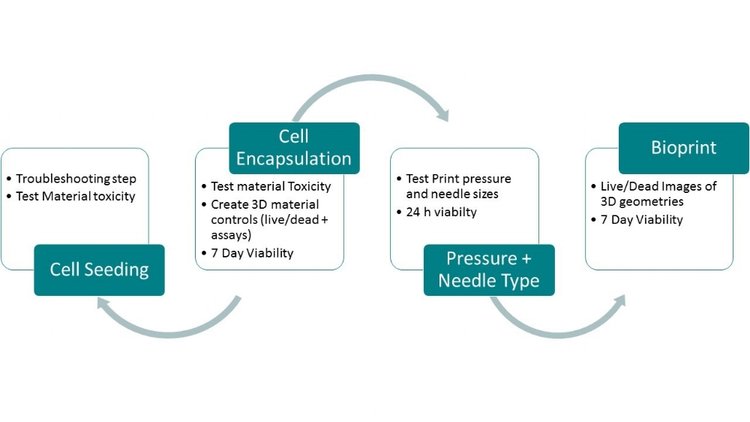
Viability Testing

Viability testing is completed to create 3D controls for a new material. First, a cell encapsulation or cell seeding study tests material toxicity and crosslink settings and creates a 3D control for future bioprinting studies. In this study, thin films of the material are compared to 2D culture controls. If there are issues with viability, a cell seeding study is used as a troubleshooting step. This study determines if viability issues are due to impurities in the material, or were caused by encapsulated cell density or crosslink settings. For support biomaterials, a cell seeding study replaces cell encapsulation.
Next, pressure and needle type settings are tested in a bioprinting study and compared to 3D controls from cell encapsulation or cell seeding studies. Finally, more complex designs are tested in a final 7-day bioprinting study. The printed designs from this bioprinting study can then be used as controls in future studies using different designs or print settings with the same material.
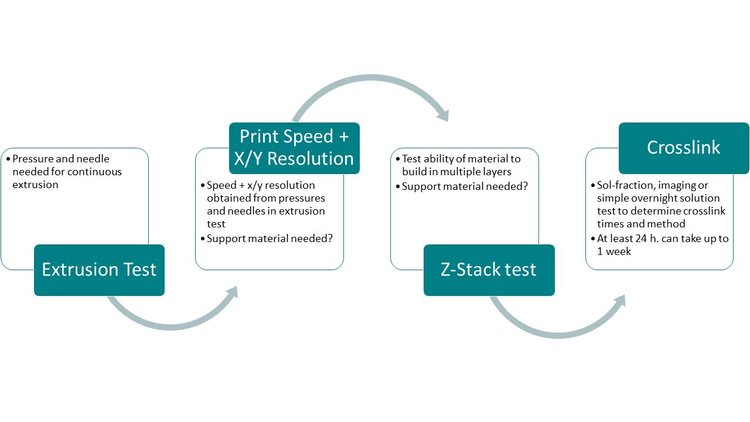
Print Parameters

To determine print settings for a custom bioink, a step-wise process described above is completed. First, an extrusion test is completed to determine needle size and print pressure. Next, X/Y resolution is determined through a series of test prints. At this stage, users may determine if a reagent needs support material. Next, a z-stack test helps determine the ability of a material to build in height, as well as z resolution. While some materials may not need support for the printing of a single layer, support materials may be necessary to build in height. Finally, a crosslink test is completed to determine necessary crosslinking parameters to build a lasting 3D structure.
You can find more detail in our print parameter optimization guide.

