


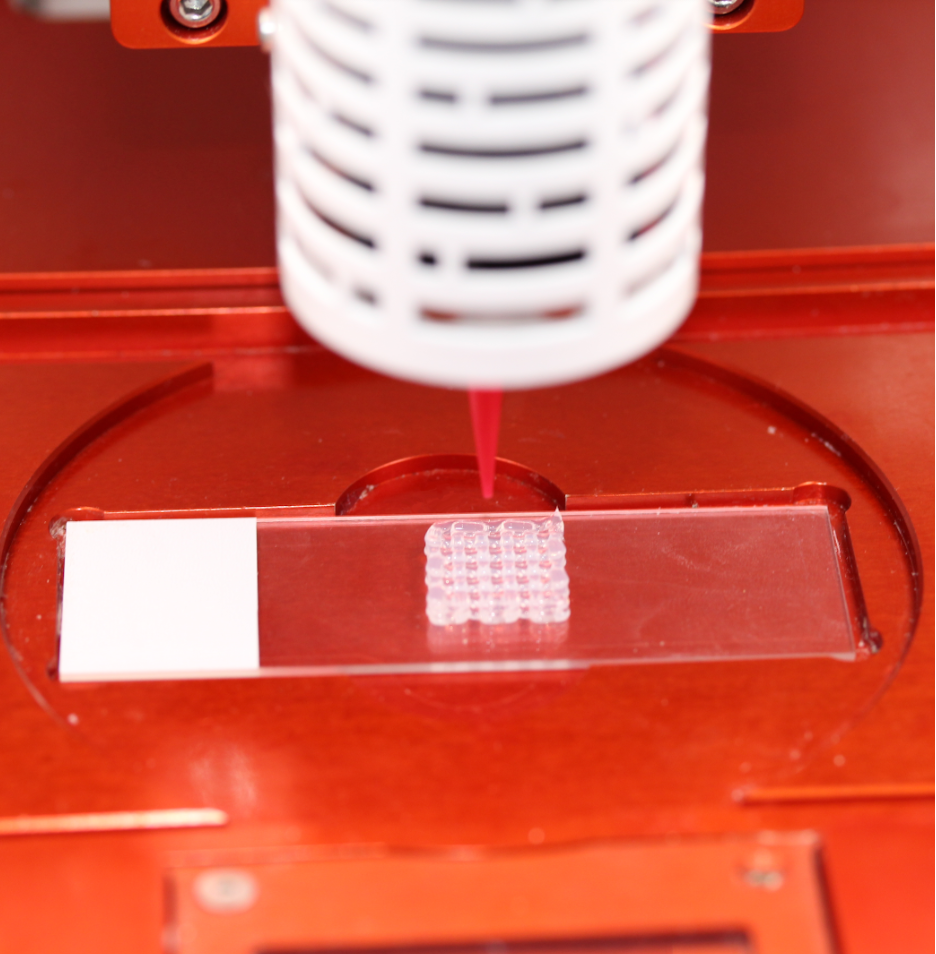
Overview: Silicone Bioprinting
This protocol is a step-by-step guide to bioprinting silicone. Silicones are a class of elastomers composed of polymerized siloxanes that are characterized by their high durability, low toxicity, sealing capabilities, and excellent thermal stability. These properties make silicone an attractive material for cell based applications, from organs on a chip to implants. Allevi silicone is a translucent, two-part, non-flowing formulation with good mechanical properties for successfully bioprinting 3D structures.
Materials
- Silicone Part A & B
- Centrifuge Tubes (15 mL)
- 1mL Pipette + Pipette Tips
- Allevi Sterile Syringes (5 mL or 10 mL)
- Syringe Caps
- Tapered tips, either metal or plastic
- Metal spatula
Methods
- Weigh out 15g of silicone – Part A into a 50mL centrifuge tube.
- Add 1.5mL silicone – Part B to this tube, then mix thoroughly with a metal spatula.
- Add this mixture to a syringe then cap.
- Note: due to its high viscosity, silicone – Part A can be loaded by scooping with a spatula and transferring to the syringe barrel.
- Prepare a counterweight for centrifuging. Weigh the syringe and silicone then fill a separate 15mL conical tube such that when capped it is the same mass as the syringe and silicone.
- Note: an unbalanced centrifuge can cause injury or damage to the unit. Ensure samples are properly balanced prior to centrifugation.
- Centrifuge the syringe at 2000g to push all material to the front of the syringe and remove entrapped air bubbles.
- The syringe can be placed inside a standard 15mL conical tube holder such that the flanges hang over the edge.
- Add syringe silicone plunger to the rear of the syringe, keeping it sideways while sliding to the back of the silicone and then rotating into place with a spatula.
- Secure desired tip, then load the syringe into the extruder
- Set the pressure to 50 PSI and extrude a small amount of silicone to prime the tip before wiping the extruded silicone away.
- Secure printing substrate to the printer bedplate.
- Note: if autoclaving or heated curing is desired following printing, make sure to choose a substrate that is compatible with desired temperature.
- Load the nozzle and syringe system into your printer’s extruder.
- Calibrate the extruder, then load a print file or open an experiment and press print to begin.
- Observe the print in the event of issues with material flow or initial layer deposition.
- Once complete, remove the printing substrate and place in a 50C oven overnight before autoclaving to sterilize.
- Note: ensure the chosen print substrate is compatible with the higher temperatures required for curing and autoclaving.
Print Settings
| Gauge | Nozzle I.D. (mm) | Layer Height (mm) | Speed (mm/s) | Pressure (PSI) | Print Temp (℃) |
| 25G Tapered | 0.28 | 0.35 | 4 | 50 | RT |
Troubleshooting: Silicone Bioprinting
- To ensure consistency of print properties, be sure to mix silicone part A + B the day of printing. Once mixed the silicone will begin crosslinking and its material properties will alter over time.
- Do not reuse centrifuge tubes after mixing silicone, previously cured silicone fragments can cause nozzle blockage.
- Use a transfer pipette to more easily transfer silicone part B.
- It will be difficult to image through silicone constructs, be sure to leave or create windows if visualization of samples is necessary.


