Quickstart Guide: Allevi 1

getting started with the Allevi 1 bioprinter

Specifications

Setting up your bioprinter

  1. Carefully remove your bioprinter from the packaging by grasping its frame firmly with both hands. Please retain the original packaging and box in the event you have to move or ship the printer at a later time.
  2. Once the printer is securely placed on a flat surface, connect the CORE extruder to the gantry. The CORE extruder is magnetized so it will snap into place.
  3. Connect the red plastic air hose to the top of the frame, and the air input junction to the port on the back of the frame.
  4. Plug the power cable into the power port located on the right side of the back of the bioprinter. Then plug the other side into a wall outlet.
  5. Power on the bioprinter by pressing the power button located on front of the bioprinter. It will turn red.
  6. Connect the air compressor to the black air hose, and the air hose to the air input junction on the printer.
    • The connection between the hose and the junction can be tricky. Follow this diagram:

getting started with the Allevi 1 bioprinter

Setting up your software

  1. Go to bioprint.allevi3d.com. Our software runs out of a browser and requires no downloads! We recommend Google Chrome or Firefox, but Safari and Edge are also acceptable.
  2. Login to the software. To set up an account, click ‘Create an account’ and fill out the form.
  1. Creating an account is great, but let’s get you set you up to add some teammates! Follow our Allevi Teams Guide to create a Team. We recommend doing this first so that your printers and files are easily shared with others. As you follow the rest of these instructions, make sure your Team account is active, rather than your Personal account.
  2. To register your printer, scroll down in your printer list and click ‘Add printer.’
  1. Type in your device serial number and click ‘Add printer.’ Your serial number can be found on the back of your printer or in your onboarding email from the Allevi Support Team.

  1. Once your printer is registered, it will appear as an available printer in your printer list. You can also see its Internet connection status.

Connecting to your printer

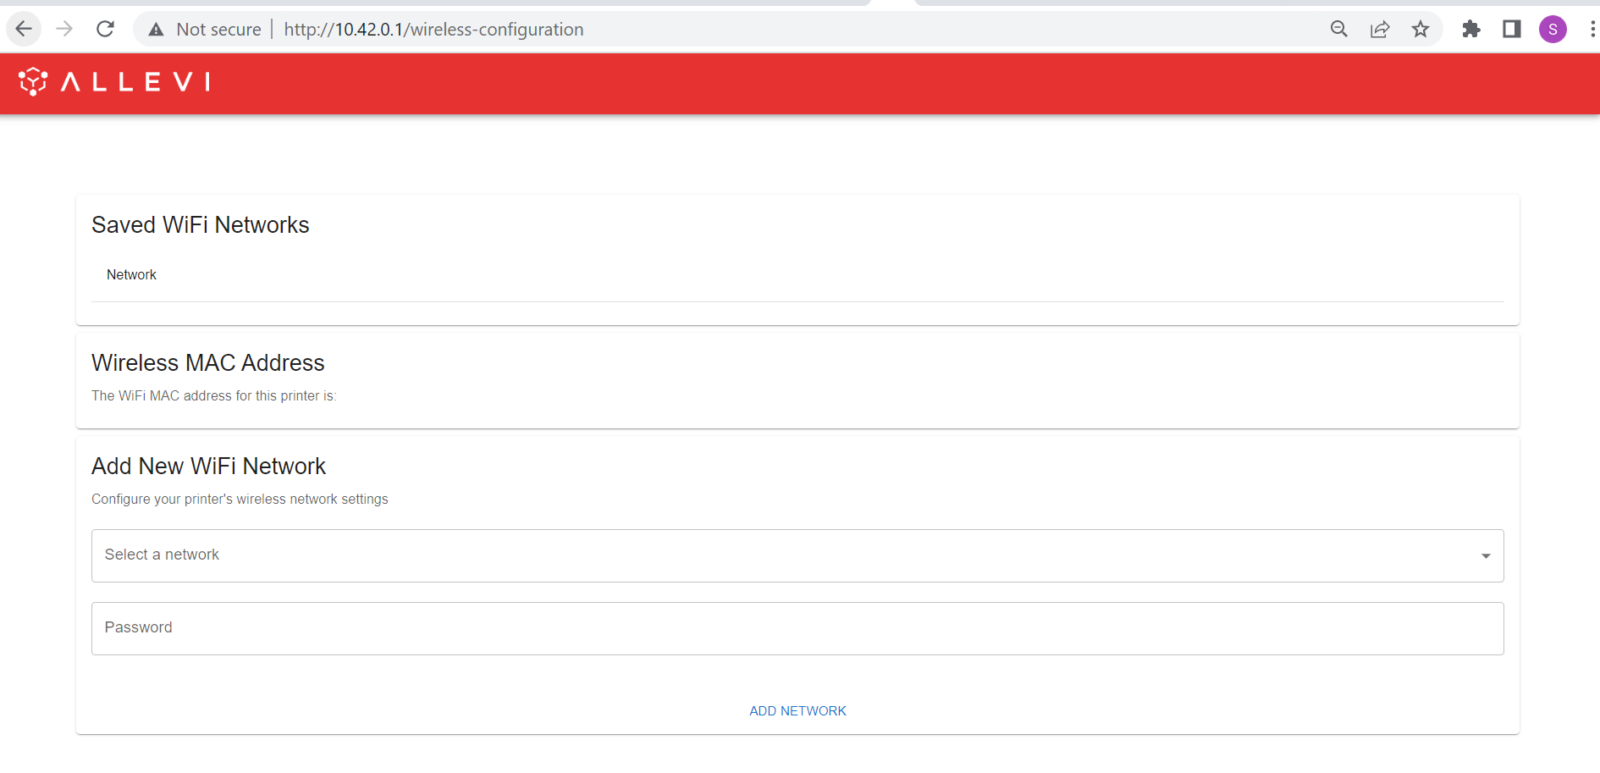
Networking requirements:

A downloadable PDF containing our updated networking requirements for both our Bioprint Software and for the Bioprinter can be found in our Allevi Wi-Fi Connection Troubleshooting Guide at the below link:

https://www.allevi3d.com/allevi-connection-troubleshooting-guide/

Cloud Mode:

  1. To use cloud mode connect your Allevi bioprinter to the internet using either an ethernet (wired) or Wi-Fi (wireless) connection. Please note that you will need to be in cloud mode for any future firmware updates.

Ethernet connection:
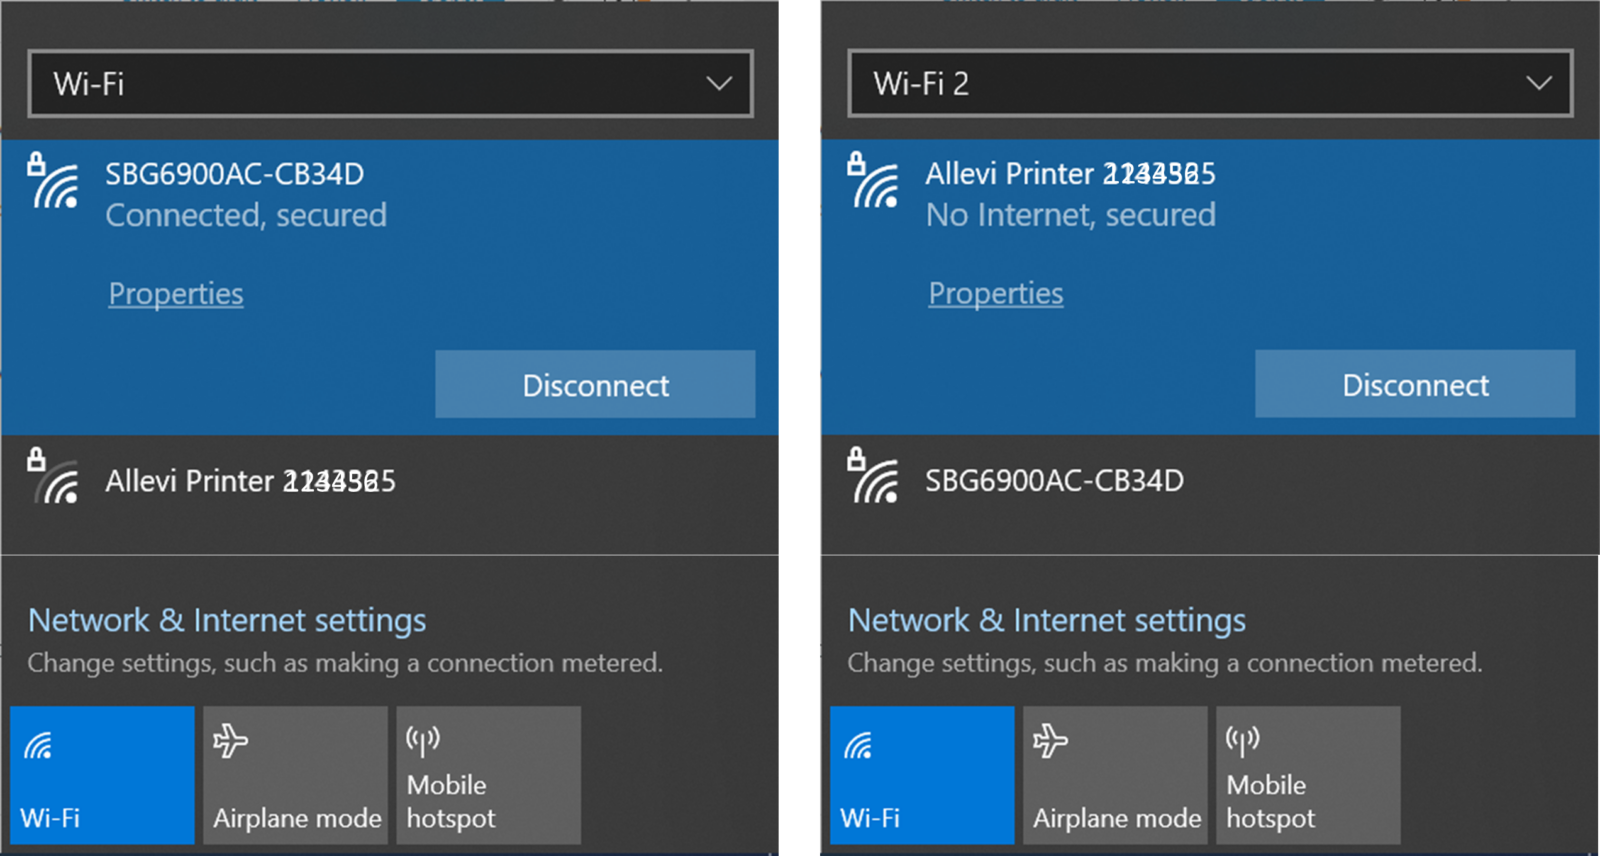
  1. To connect your Allevi bioprinter via ethernet, plug an ethernet cord to the port on the back of the bioprinter and to an ethernet port in your lab. Your Allevi bioprinter will be in cloud mode now and ready to connect to in your bioprinter dashboard.

Wi-Fi Connection:

With a Wi-Fi connection, your Allevi bioprinter will be online in cloud mode.
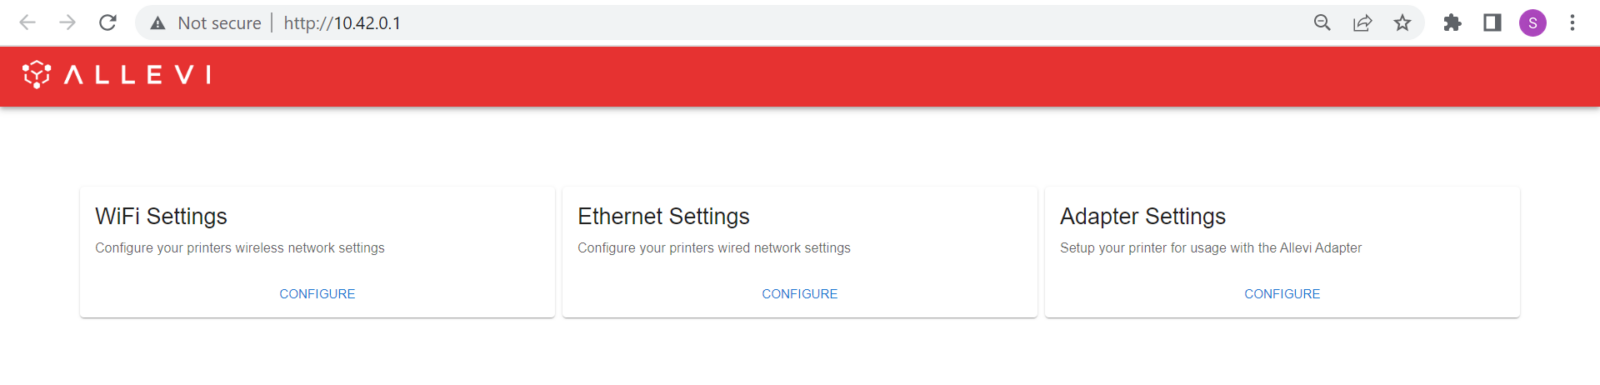
  1. Open your the WiFi settings on your computer and look for a network called “Allevi Printer <serial number>.” Connect to this network. The password for the Allevi Printer <serial number>network will be allevi_<serial number> where the last seven digits will match the printer serial number.
    • To type in a password, you may need to click “connect using security key instead”
    • By connecting to the Allevi hotspot, your computer will briefly lose access to the Internet.
  2. Open a browser tab and go to http://10.42.0.1/ . This will open the Printer Configuration screen.
  3. Click the ‘Configure’ beneath the WiFi Settings header.
  1. Click Configure under ‘Wi-Fi Settings’ and enter your network credentials on the next screen. The chosen Wi-Fi network should be a private network without a ‘Click to accept’ intermediate page. Once the network has been successfully added, a green message will pop up at the bottom of the page. You can now close this window.
  2. After a successful Wi-Fi connection is added, your printer should attempt to join your selected network using the login credentials you just entered and should stop producing the “Allevi Printer <serial>” network.
  3. Reconnect your laptop to your institution’s wireless internet and navigate back to Login | Allevi Bioprint Online (allevi3d.com). Your bioprinter will be in cloud mode and ready to connect to in your bioprinter dashboard.

Adapter Connection:

With this connection method, your Allevi bioprinter will not be connected to the internet itself, but it will communicate directly with your computer via the Allevi Adapter.

  1. Download the official driver here. Extract the downloaded .zip file and run the installer. This allows your computer to connect to two Wi-Fi networks at the same time.
  2. Download the Allevi Client app here. Extract the downloaded .zip and run the application. You’ll need to keep this open whenever you are using your Allevi bioprinter.
  3. Plug your Allevi Wireless Adapter into your computer’s USB port.
  4. Turn your Allevi bioprinter on.
  5. In your Wi-Fi list, you should see a dropdown to select different Wi-Fi networks. The dropdown allows you to switch between “Wi-Fi 1” and “Wi-Fi 2”; however, on some computers this may be called “Wi-Fi 2” and “Wi-Fi 3”. See the screenshot below for an example with “Wi-Fi 2” and “Wi-Fi 3”. It does not matter what your networks are called, as long as they are connected as follows:
    • Lower Numbered Wi-Fi: Connect this to your home or work Wi-Fi network
    • Higher Numbered Wi-Fi: Connect this to the Allevi Bioprinter Wi-Fi Access Point, called “Allevi Printer <serial number>”
    • The password for the Allevi Printer <serial number> network will be allevi_<serial number> where the last seven digits will match the printer serial number.
    • To type in a password, you may need to click “connect using security key instead”
  1. Navigate to https:/bioprint.allevi3d.com/ and log in as normal using your Bioprint credentials.
  2. On your bioprinter dashboard, turn off your Allevi bioprinter’s Cloud Mode using the cloud icon and follow the system prompts. This will take 3-5 minutes to complete.
  3. If connection is successful, you will see the following state on the Allevi Client Application and a green connect button in the bioprinter dashboard.

Running a Bioprint

  1. With your Allevi 1 turned on and connected to the Internet, you can get started by clicking connect!

  1. This will bring you to your printer Status section. Here you can get an overview of your print settings.

  1. The next section is your Current Print section. You can either upload STL or G-code files. If you upload an STL, you can modify the Allevi Online Slicer settings. For STL files, you can changes settings such as Print Settings, Infill, and Offsets. You can also download a sliced STL as a G-code file.

  1. Next, choose your dish in the Build Plate section. For wellplates, print files will automatically be replicated in all wells.

  1. The Extruders section allows you to move and calibrate your extruder. You can also set extruder temperature, pressure, and test extrude by holding the button. With a syringe and needle loaded, click ‘Autocalibrate’ to get started.

  • To manually calibrate the printer, open the jog panel:
    1. Click the origin button under the X/Y controls. This will center your extruder over your chosen build plate.
    2. Using the Z controls, move the bedplate closer to the loaded extruder to the point where the dish is almost touching the needle.
      • NOTE: Use the test extrude button to see if the needle is properly positioned. If the needle is too low, no material will come out. If it is too high, then a dangling line will be extruded.
      • Under extrusion, the needle should just touch the dish. Do not leave a gap between the needle and dish as the G-code automatically adds the appropriate layer height. Finer 0.1mm and 0.05mm movement can be used when approaching the dish.
    3. Click ‘Set Calibration’ to save your position as the calibration.

  1. In the Crosslinking section, there are three main settings: Always On, During Print, and Post Print. They use variables such as light intensity, layer frequency, and duration. For photocurable bioinks, the Allevi 1 offers both UV (365nm) and Visible (405nm) light crosslinking.

crosslinking parameters - getting started with the Allevi 1 bioprinter

  1. Once you’ve loaded a print file and calibrated your extruder, you can click ‘Print’ to start building with life!

getting started guide bioprinting on the Allevi 1 bioprinter

Share this post

Need help with something else?

Ask us on chat →

Or get in Touch via email ↓