


The Allevi CORE Print Head is the most powerful bioprinting extruder in the world, offering the widest set of features which enables you to print with nearly any biomaterial.
A print temperature of 4°C is important for many hydrogels, especially ones that thermally crosslink. For example, in our Collagen LifeInk 200 bioreport, we found that when printed at room temperature, the collagen thermally crosslinked in the syringe. This increased hydrogel stiffness which in turn increased shear stress during printing, leading to lower cell viability. A cooling extruder is also beneficial for Matrigel, for which we have the only Corning-approved protocol for bioprinting.
It is important to note that the outside of the CORE print head gets hot when cooling. You can think of this as transferring heat from inside the extruder to the outside OR running of electronics. When finishing work with a temperature sensitive bioink, you should remove it from the CORE print head before turning off your Allevi bioprinter. This is because once the printer is turned off, it no longer controls the temperature of the print head and the heat on the surface quickly equilibrates throughout the print head, heating whatever is in the syringe.
160˚C allows you to work with thermoplastics such as PCL, PLGA, and Carbohydrate Glass (CHG).
A CORE print had has both blue (405nm) and UV (365nm) crosslinking LEDs. These can be controlled via the software in three different modes. Depending on how far your dish is away from the construct, you can achieve up to 20 mW/cm^2.
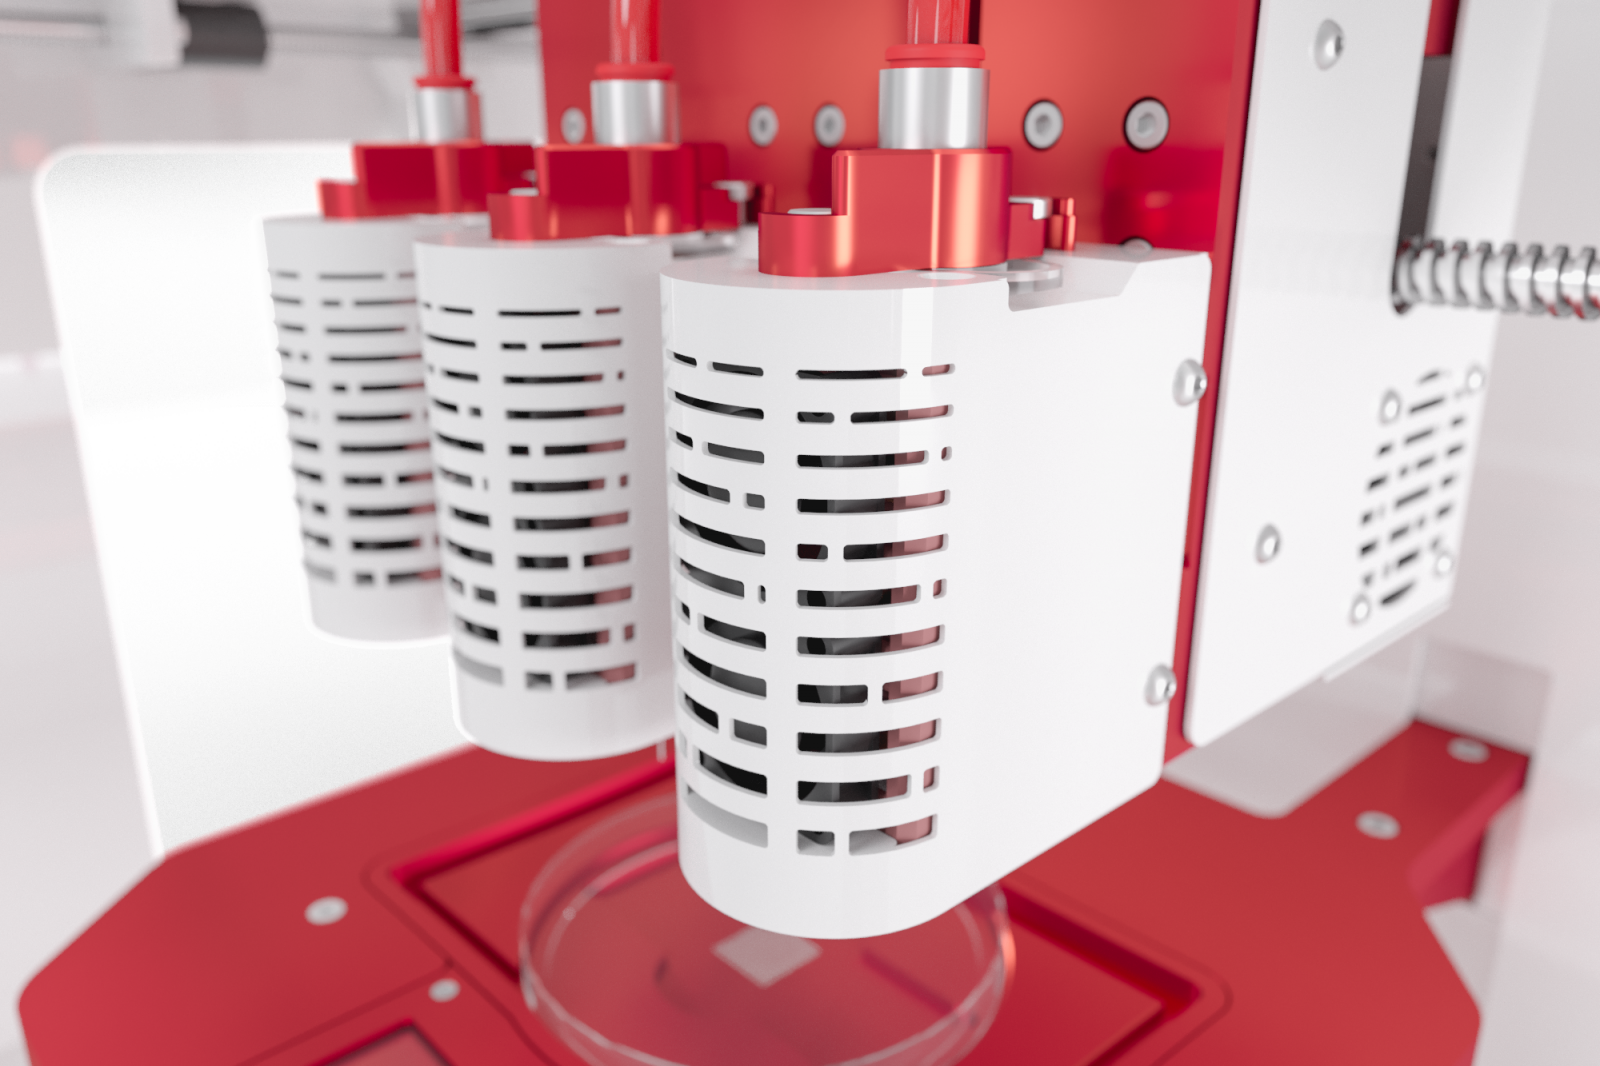
The CORE print head utilizes pneumatic pressure as its extrusion mechanism. Therefore, before you can start working with your CORE print heads, you need to set up the extruder air supply system. There will be red tubing and a twist cap included for each extruder on your platform. Connect one end of the tubing to the pressure supply port on the top of the printer’s frame and the other to the narrow end of the twist cap. To remove it, push down on this ring to release the securing mechanism and pull the tubing out of the port.
We understand that bioprinting is an exciting, growing field and you may want to try other printing methods. To support you and make your purchase a good investment, we’ve future-proofed the Allevi 1 and Allevi 3 by adding the ability to swap your print head with a different one. The CORE print head attaches magnetically to the printer. Make sure the print head is securely attached before printing by making sure the locating pins are correctly aligned.
For less viscous materials, screw a cap onto your syringe and invert it. Pour your material in from the top. Insert a stopper into the opening and re-invert your syringe. With your material now against the stopper, use a plunger to slowly push it up towards the tip of the syringe. Makes sure the plunger doesn’t reattach to the stopper. For thicker materials, check out our guide for loading viscous materials into syringes!
For high temperature materials (>60˚C), you should only print using metal syringes with metal tips or full metal needles. To get started, load the pellets, powder, or paste of your material into the metal syringe. Make sure that it fills the bottom of the syringe. Attach a metal needle firmly, using pliers to ensure a tight seal. Then, connect the wide end of the metal syringe to the twist cap. With the metal tip connected to the syringe and the syringe connected to the air tubing via the twist cap, you can load the syringe system into the CORE print head. The twist cap should lock into the print head by swooping the hooks of the twist cap under the shoulder screws on top of the extruder.
In order to achieve a proper viscosity for printing, you will need to preheat your material. This can vary from material to material, but we recommend 15-30 minutes at your print temperature. We recommend determining the correct preheating duration for your material before starting extensive printing.
Allevi 1s and Allevi 3s offer autocalibration and manual calibration functionality. Allevi printers require that all attached print heads are calibrated. If you’re not using all the print heads for a print, you can detach them and set them aside.
If you’re printing at high temperature (>60˚C), we recommend not printing on a plastic build surface, as the heat from the tip may damage the dish. Glass or metal build surfaces are good substitutes.
NOTE: Your printer may not be set to use glass or metal surfaces with autocalibration. Because of this, we recommend manual calibration. Improper use of autocalibration may result in broken build surfaces or needles. Please contact [email protected] with any questions or concerns.
Like the printer, the print head has an aluminum frame so you can use the standard UV and ethanol cleaning protocol. The front of the CORE print head has vents, so be sure not to over-spray ethanol onto the electronics. Additionally, all Allevi syringes and syringe tips are autoclavable.
IMPORTANT: If you have just finished printing at a high temperature, your CORE print head may be hot for over 1 hour afterwards! Always assume an extruder may be hot and never handle a hot extruder without gloves.
Your bioink should only ever contact the inside of the syringe and the tip, so these are the only materials you should need to clean.
Plastic syringes are recommended to be one-time use, but can be cleaned with soap and water, depending on the material. Plastic syringes, needles, and non-full metal needles cannot be cleaned with chloroform.
To clean the metal syringes and full metal needle, place them in chloroform.
Do you have more questions about your CORE print heads and how you can use them for your application? Contact the Allevi Success Team at [email protected].


