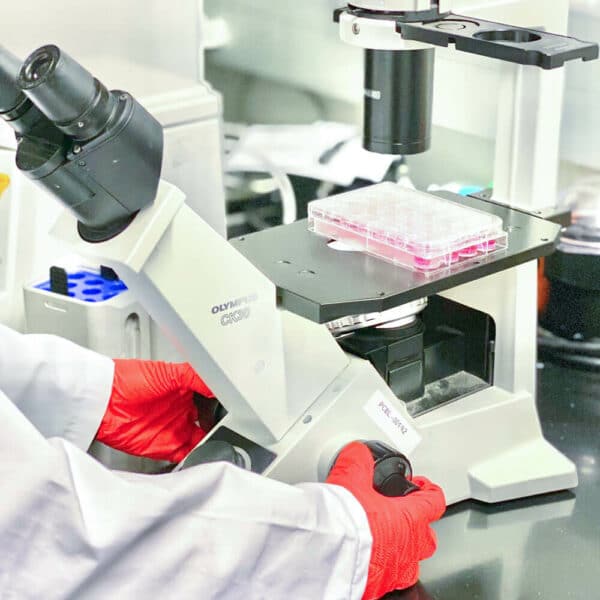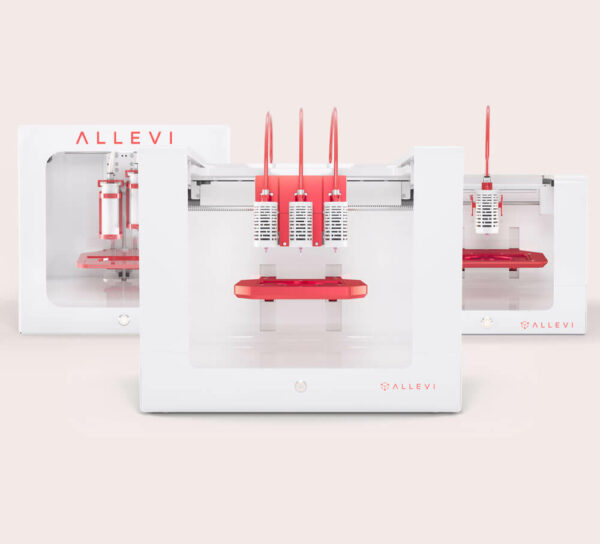
3D Bioprinting is the application of 3D printing to the patterning of living cells, biomolecules, and biomaterials. It allows one to have microscopic control over cellular environment variables, and macroscopic control of construct geometry. This is important because the cells in the human body function in a fully three-dimensional environment. Recreating this environment gives one the ability to work with more physiologically relevant models of living tissue. This article outlines the basic knowledge that experienced researchers use to run experiments and inform their further research, with a focus on microextrusion-based 3D bioprinting.
Learn to 3D Bioprint Section #1: Bioprinting Preparation
Selecting a Cell Type
The type of cells, or cell line, you want to work with will determine many of the constraints on the rest of your printing process. Some tissues, like skin and tendons, are fairly well understood and can be grown into robust structures with relative ease. Others, like nerve tissue, can be difficult to work with. It is important to strike a balance between clinical relevance and ease of use for your cell line. You may also need to consider the maturity and source of your cells. Does your research require a clear contrast between human and non-human cells? Do you need to be sure a certain type of human tissue works perfectly in your construct? Will you be printing a model biological system that needs to be the closest representation to developed tissue or do you need to prove that your work can foster cell growth and differentiation?
Alternatively, your choice of cell line might be determined by the ink you are using. For example, you might have a novel ink that is very thick and requires relatively high forces to extrude. Delicate cells like nerve cells might be a poor choice for experiments with that ink.
For recommendations on cell lines and biomaterials to use with different tissue types, check out our page Cells and Bioinks. Below, we begin the discussion of different bioinks and biomaterials.
Overview of Bioink Types
Bioinks are biomaterials used in 3D bioprinting. A bioink’s material properties affect its interactions with cells and its success as a bioprinted construct. One way to make sense of the wide range of materials used in bioprinting is to sort them by their roles in the printing process. A given bioink can be a matrix ink, a support ink, or a sacrificial ink.
Matrix Inks
Matrix bioinks hold and support cells, an important role in bioprinting. Most matrix bioinks are hydrogels, meaning they are primarily composed of water. Bioinks currently available on the market offer strengths and weaknesses, often meeting some but not all requirements necessary for bioprinting. Reagents in other categories can help compensate for these weaknesses. See the table below for some examples of matrix inks and their main uses. Click here to learn more.
| Reagent | Application | Source | Resolution (mm) | Sacrificial Support? | Curing Reagent |
|---|---|---|---|---|---|
| Alginate | Soft Tissue | Natural | 0.15 +/- 0.03 | FRESH | Calcium Chloride (CaCl2) |
| Collagen | Soft Tissue | Natural | 0.32 +/- 0.03 | FRESH | None |
| Gelatin Methacrylate (GelMA) | Soft Tissue, Hard Tissue | Natural | 0.40 +/- 0.03 | None | LAP |
| PhotoHA | Soft Tissue | Natural | 0.50 +/- 0.03 | None | LAP |
Support Inks
Support bioinks are biocompatible materials that provide better mechanical properties than matrix inks. It is common to use support inks to bolster bioprinted constructs since hydrogels tend to be soft with low structural integrity. Support bioinks are also often used for connective or hard tissue applications, such as the fabrication of cartilage, bone or muscle tissues. See the table below for some examples of support inks and their use conditions.
| Bioink | Melt Temperature (°C) | Resolution (mm) |
|---|---|---|
| Hyperelastic Bone | Room Temp | 0.30 – 0.40 |
| Polycaprolactone (PCL) | 60 | 0.16 +/- 0.04 |
| Poly (lactic-co-glycolic acid)(PLGA) | 72-77 | 0.15 +/- 0.01 |
Sacrificial Inks
As their name implies, sacrificial bioinks are designed to be deposited as temporary support and then removed in post-processing. They are usually used for the creation of complex negative geometries such as vascular networks. In some cases, they can also be implemented to improve the resolution of prints made with materials that have poor shape fidelity on their own. See the table below for some examples of support inks and their use conditions.
| Reagent | Method for Removal | Matrix Bioink Compatibility |
|---|---|---|
| Pluronic F127 | Cool | GelMA, Collagen, Alginate |
| Carbohydrate Glass | Heat | PDMS (Organ-on-a-chip) |
Other Biomaterials
Bioprinting relies heavily on using biocompatible materials in order to create microenvironments that mimic biological systems.
Support Baths
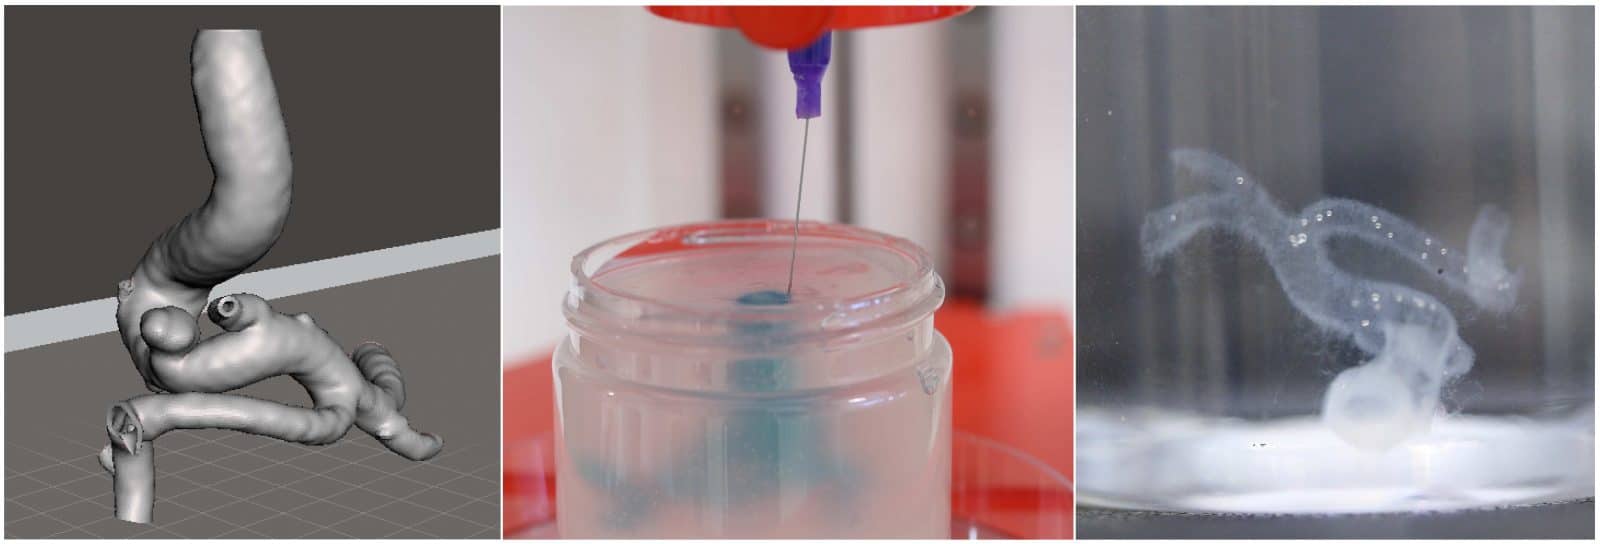
While support and sacrificial bioinks can offer permanent or temporary reinforcement, this does not help constructs that are solely comprised of soft hydrogels or otherwise too geometrically complex. Methods such as FRESH involve printing into a support bath, enabling the creation of such structures.
Additives
By encapsulating cells in bioinks, the cells are able to grow and remodel the bioprinted construct in a living tissue. Being in a native bioink helps them do this because it has native proteins. Proteins are unique to different tissue types and add specificity to bioinks, allowing them to be customized to a certain application. Proteins such as vitronectin or fibronectin are used in the body to regulate cell behaviors such as adhesion, migration, proliferation, and differentiation and mediate interactions with collagen, heparin, and GAGs.
Photoinitiators
Photocrosslinking is one of several crosslinking options that increase the hardness of a matrix ink which can be desirable in some constructs. Photocrosslinking in particular uses the energy in electromagnetic radiation to activate the hardening process. Photoinitiators are substances that introduce the necessary free radicals to a matrix bioink to allow photocrosslinking. They vary primarily in the range of the electromagnetic spectrum that can activate them.
Guide to 3D Models
Before you can 3D print something, you have to know what that object looks like. Whether that object is a simple test cylinder or a complex blood vessel network, you usually start with a 3D model, convert that model to an STL file, then convert that STL file to a G-code file which your printer interprets into motor movements. Below, we discuss how to take your print object from idea to STL.
Design it Yourself
There are many programs that will let you design a 3D model yourself. These are often referred to as CAD (Computer Aided Design) programs. SolidWorks, Inventor, and AutoCAD are all popular options, but there are plenty that you can explore. The main advantage of designing your own model is the control you have over the shape. Once you have sculpted your model to your preferred specifications, you can save your CAD file as an STL file and then you are ready to continue to slicing.
If you are a Pro Software subscriber you will also have access to the Integrated Shape Editor which lets you originate and manipulate cylinders, prisms, and droplets all in the same user interface as the rest of your printing.
Convert from Medical Imaging
Another technique many researchers use when developing their 3D models is to convert medical imaging samples to STL files. CT scans are the most commonly converted type of imaging but most forms can be used, especially if they can be saved as a DICOM (Digital Imaging and Communications in Medicine) file. The conversion is performed by software which translates the light intensity recorded in the imaging sample to a corresponding tissue type, and determines the bounds between tissues. Programs such as Mimics, 3D Slicer, and InVesalius 3 are all popular options. The main advantage of converting medical imaging results is the clinical relevance of the models produced.
Use a Database
If you don’t have access to clinical imaging samples, there are many databases with DICOM derived STLs to choose from. Many academic institutions have their own libraries and private collections exist that offer licensing agreements. You can find a list of databases below.
- Biomedical STLs
- General STLs
Print parameters
Each material used in 3D bioprinting requires different settings to get optimal extrusion and clean lines. Print parameters can affect outcomes on a microscopic level, such as cell viability, as well as macroscopic outcomes, such as pore size and structural fidelity. Below we discuss the key parameters for the pneumatic extrusion bioprinting process with Allevi bioprinters.
Slicing parameters
Slicing, or the process of converting an STL into a G-code file, requires different settings that tell the software how to partition the STL into layers and the printer how to move to create the construct. These settings include layer height, nozzle size, and print speed. In general, layer height is closely related to nozzle size since nozzles tend to have circular cross sections. It’s important to note that print speed refers to the motion of the extruder relative to the print surface, not the flow rate of the extruded material. Variations in material properties such as viscosity cause different materials to perform better with different settings. For example, some materials are very viscous and extrude slowly, requiring a slow print speed to match.
It is important to note that the limiting factor for printed biomaterial resolution is the diameter of the needle. Resolution also generally improves with lower layer heights and higher print speeds. However, extrusion becomes easier with larger nozzle sizes, larger layer heights, and slower print speeds. The balance between these parameters is often the subject of print optimization which is discussed below. After choosing these parameters, you can slice an STL into a G-code.
Infill refers to the material inside the characteristic surfaces, or shells, of your print. In other 3D printing applications infill is usually defined by geometry and % volume occupied. The Allevi system gives you more precise control of your final construct by letting you set the distance between the infill lines in your chosen infill pattern. The shape and amount of infill you need will vary with the purpose of your construct and the cell line you are using.
Printer Parameters
Once your G-code is ready, you still need to enter the correct printer settings for your material. In the Allevi pneumatic extrusion platforms these include pressure, temperature, and crosslinking.
Over time, we’ve optimized parameters that work well for some common biomaterials. These general print parameters are great for just getting started with a new material and as a starting point for further optimization.
Needle
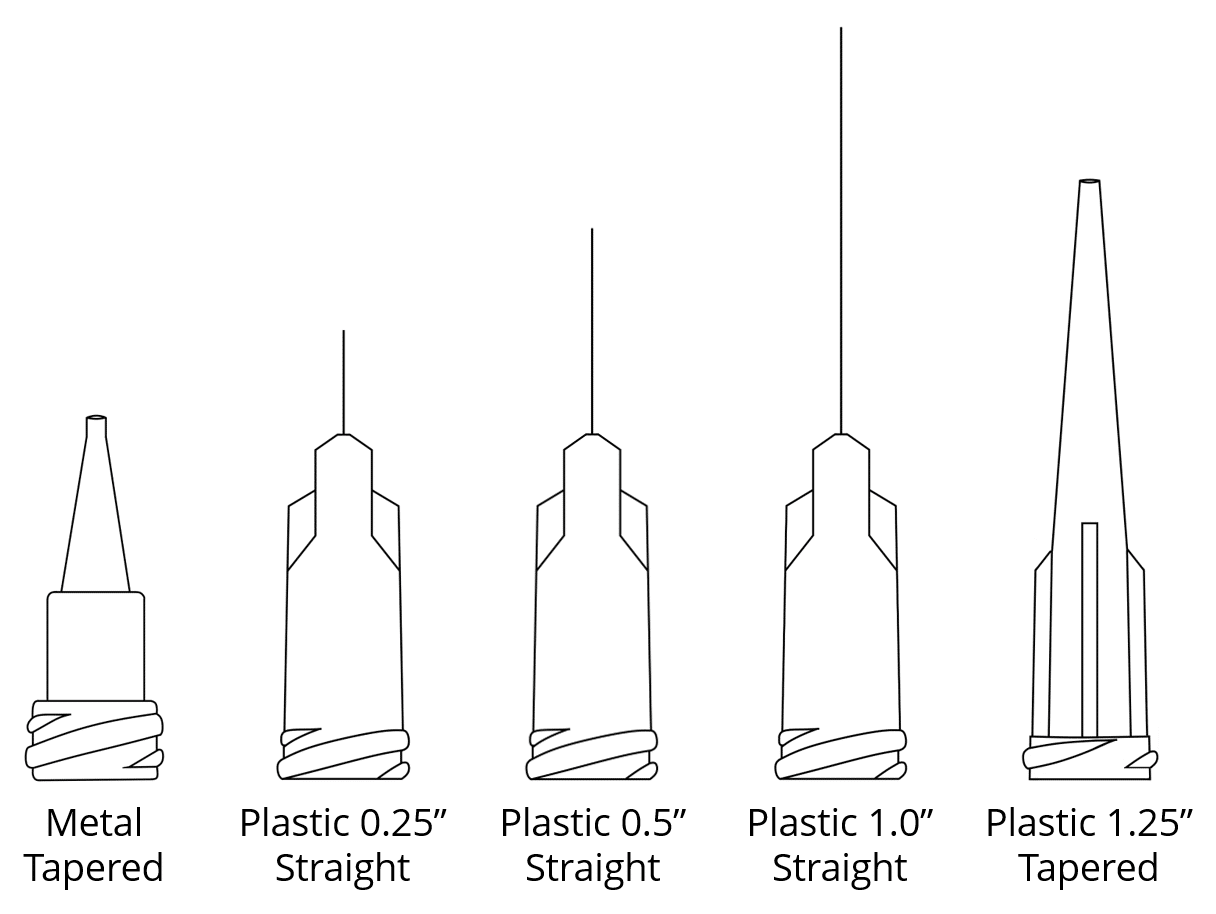
Needle features such as gauge, length, profile, and material significantly affect the pressures, temperature,and speeds you can use. While it’s typically obvious what the best choice for your needle is, use our guide to picking your needle to weigh all the factors.
Crosslinking
Crosslinking is a process by which the molecules of a soft network change their interactions, causing the material to stiffen. This can be achieved by several mechanisms discussed further below. Allevi printers incorporate LED’s that can be used in photocrosslinking. The Allevi 3 platform also incorporates a heated bedplate for thermal crosslinking. Chemical crosslinking can also be utilized with the help of printer accessories like petri dishes and coaxial printing nozzles.
Optimization
Applications vary and so do your target specifications for your end construct. Maybe you’re going for speed and high throughput, or maybe you’re more focused on fine resolution. Either way, optimizing print parameters is a key step.
Build plates
Common types of buildplate
There are three basic types of build surfaces: glass slides, petridishes, and wellplates. Slides are useful for moving a construct over to a microscope for imaging. Petridishes offer a very simple build environment suited to large constructs and testing. Wellplates offer convenient sorting for assays. The Allevi platforms are designed to work with industry standard pieces in each of these types. In fact, the autocalibration function in the Allevi 1 and Allevi 3 platforms is programmed to compensate for the manufacturer specified depths of support build surfaces, ensuring a precise calibration and printing experience.
Bowing and curvature
Some build surfaces exhibit bowing, or a convex arch in their base. This can create a problem for extrusion bioprinting since the material deposition occurs in layers. If one point of the build surface is higher than another, you run the risk of scraping against your build surface with a low pass or imprecise deposition with a high pass.
Glass vs plastic
While most petri dishes and wellplates are plastic, glass is an alternative that can have benefits.Glass has a higher temperature tolerance and is chemically resistant while some plastics may react to organic solvents used in some bioinks. Glass also experiences less bowing. However, given the same dimensions, glass is heavier and more expensive. Additionally, broken glass can pose a hazard. You can put cell friendly coatings on either. For some printing with viscous substances, both might be too smooth for precise deposition. In this case, you can use different print surfaces to increase the friction of your surface.
Substrate stiffness
Cells survive best in biomimetic environments. As such, the geometry and stress profile of a cell’s environment can influence cell viability and differentiation. To get the best results out of your cell it may help to introduce an additional structure to your build surface to alter the conditions of a plain slide, plate, or dish.
Heating/cooling
The mammalian cells used most frequently in tissue engineering benefit from being kept in a temperature range near mammalian body heat. To help reproduce this effect, the Allevi 3 system has a heated bedplate that can be raised to temperatures as high as 60°C. This can be especially useful for longer prints.
Some materials are very temperature sensitive and the mechanical properties of a construct may be affected by the temperature maintained in the build environment. For some materials, like collagen, it might help to perform a print in a temperature controlled (cold) room. For other materials, the different temperature of a build surface might be enough to cause thermal crosslinking, adding structural integrity to a construct.
Learn to 3D Bioprint Section #2: Cell Culture
Cell culture is the process of growing cells in a controlled laboratory environment. It is an important aspect of 3D bioprinting because bioprinting studies require many cell. Cell culture typically begins with the purchase of cells from relevant cell lines. We discuss picking a cell line in the beginning of Section 1 above.
Once you have selected appropriate cells for your goals, you will likely need to grow the sample you purchased into a large enough batch to use in a bioprinting experiment. For cell-laden bioinks, cell concentrations can range from 1-10 million cells per milliliter of bioink. A single bioprinting experiment can easily require 50 million cells. Read more about cell density in our guide to Choosing the Right Cell Number.
There are further notes on bioprinting experiments below, but the period after your print is finished is another key aspect of cell culture. In most cases, it is important to see how cells fair in or on your construct over time. As such, it is important to plan the maintenance of a controlled, cell friendly environment for your bioprint.
You can find cell culture protocols on our Protocols page. The Allevi Shop makes it easy pair your bioinks with your cell lines and cell culture reagents.
Learn to 3D Bioprint Section #3: Planning Your Bioprinting Project
There is so much that goes into a bioprinting project that figuring out where to start, and determining what information you need to progress can be really confusing. Bioprinting projects can vary tremendously. There are, however, milestones common to most projects that can be helpful to consider when planning your own.

The goal of your bioprinting project naturally plays a large role in determining your experimental steps. Here we present three archetypal project types differentiated by their goals:
- A biological project focuses on the biological aspects of bioprinting. It is usually concerned with illustrating some biological phenomena or testing a biological response to a specific 3D culture scenario.
- A material project focuses on the material science of the components of bioprinting. It usually seeks to verify the usefulness of a novel bioink, or develop a biological use for a previously studied material.
- An application project focuses on demonstrating a new bioprinting technique. It usually uses well studied biological and material components to highlight the novelty of a new method or new equipment.
We have also loosely defined phases which correspond to the biology, printability, and actual printing of a bioprinting project.
Phases A and B
Phases A and B are flexible and they can often be completed in parallel. Phase A experiments encompass the basic biology of a bioprinting project while Phase B experiments encompass the material science aspects.
Goals of Phase A:
- Confirm that you have a relevant cell line selected and the ability to culture it.
- Ensure that your cells can survive harvesting, pre-printing culture, and the process of being added to a bioprinted construct (either through direct printing or post-process seeding).
- Show that your chosen cells can survive interaction with your chosen ink, especially over prolonged periods.
Goals of Phase B:
- Ensure that your ink can be used with your printer. In the case of Allevi bioprinters, that means your material is compatible with pneumatic extrusion from a syringe.
- Determine the ideal print parameters for printing your chosen material. These should be optimized according to your goals (cell viability, construct print time, structural fidelity, etc)
- Confirm that the materials will very likely have appropriate physical properties in your later constructs.
What to Prioritize
A biological project will likely be focused on a particular cell or tissue type from its onset. It is therefore much easier to make changes to the biomaterials than the cell line or culturing techniques. Researchers pursuing a biological project will likely benefit from doing their Phase A experiments first. Then, with crucial biological details confirmed, they can continue to the more flexible Phase B experiments.
In contrast, a materials project will focus on a particular biomaterial from its onset. Usually, there will also be flexibility with the types of cells used to demonstrate biological uses for the material. Researchers pursuing a materials project will therefore benefit from spending more time on their Phase B experiments. Once they have their material optimized for printing, there are a range of well-understood cells that can be used to round out the Phase A experiments.
An application project is likely built off of the results of previous material and biological projects. As such, the experiments in Phase A and B are more about replicating results. These experiments are usually quick because they reference to the previous work heavily. In some cases, a key difference that enables the application may occur in Phase A or Phase B. A researcher doing an application project would prioritize highlighting the efficacy of such a change.
Experiments in these Phases
The goals of Phases A and B generally describe the parts of a project you need to complete to move on to printing the main constructs. But how can you be sure you reach these goals? This will likely come down to referencing similar literature and good scientific methodology. That said, there are common experiments that could show several of these goals have been achieved.
In many cases, you can use a well established cell line, even in a biological project, in order to help ensure it’s relevance. Traditional 2D cell culture assessments can also be used to make sure your cells are accurate models for the tissue you are trying to represent. Similarly, going through the culturing process and a very basic test print with your cells can help determine their viability. Typically, a live/dead assay determines the percent viability of cells, while a prolonged metabolic assay measures the degree of proliferation. For specific examples, check out our Common Viability Assays Guide. You can also follow our 2D Live/Dead Quantification Protocol which uses Fiji image analysis software to take qualitative florescence results and quantify them. For more complex constructs, refer to this 3D Live/Dead Quantification Protocol which uses Imaris software. Strong results in viability assays serve as a good indication that your cells can survive and get the necessary resources to reproduce. In your experimental design, we recommend including both 2D and 3D experimental controls.
Whenever printing cells, it is important to maintain a sterile environment! You can follow our Biostudy Preparation Guide to help make sure your printing session starts and stays sterile. Also, you can check our Cell Density Guide and Cell Mixing Guide for help preparing your cell-laden biomaterials.
When determining the printability of a biomaterial, you may need to test its viscoelasticity. Generally, you want a bioink to exhibit shear thinning, the property of behaving more like a liquid in high shear stress and more like a solid in low shear stress. In the relatively low stress environment of the reservoir of a syringe, a shear thinning material will behave more like a solid. Therefore, it will not immediately pour out through the syringe tip. Then, in the relatively high stress circumstance of passing through the shaft and lumen of a syringe tip, the shear thinning material will behave more like a fluid, causing it to flow as needed for deposition. Finally, in the low stress environment of the build surface, the shear thinning material becomes more viscous again, able to hold its shape and support its own weight.
Researchers often test viscoelasticity with a conical rheometer. Lots of literature exists to help you choose the best method for your material. Once you are confident that your ink is printable, you can follow our guide to Print Parameter Optimization to make sure you get consistent, desirable extrusion.
While the viscoelasticity of a biomaterial is its primary material property, in many cases other properties are important as well. You may need to test a polymer’s porosity by analyzing imaging results of its surfaces, especially if porosity is a key factor in drug elusion. If your construct will serve as an implant you may need to do traditional tensile testing and cyclic loading tests to make sure your material can withstand the necessary loads. You may need to determine whether your material crosslinks appropriately in its activation conditions.
Phases C and D
Phases C and D deal more with actual printing and higher level experimentation, while Phases A and B focus more on laying the groundwork.
Goals of Phase C:
- Design and print a geometrically relevant construct.
- Perform a long term (typically 14-21 day) cell culture in or on your construct.
- Show that cells behaved in a relevant way during this cell culture.
- Depending on the project, this may also be the phase to demonstrate the key novelty of the project.
Both biological and materials projects will be fairly similar at the start of phase C, the first phase where meaningful bioprinting occurs. Phase C almost always begins with making a construct that is either composed of cell-encapsulating ink or is seeded with cells in post-processing. The initial design of this construct usually begins after the file design for Phase B. The final construct often needs fine tuning to maximize printability and geometric relevance. This may include finite element analysis, Computational Fluid Dynamics (CFD) simulations, and comparison to existing organs or tissue. Culturing usually begins as soon as the bioprinted construct is finished.
Researchers often print multiple iterations at once, one without cells to behave as the control, and several with cells which they from culture at key time intervals for assessment. Some common intervals for biological assessment are 3 days, 7 days, 14 days, and 21 days. Another iteration without cells may be used to illustrate geometric properties through imaging techniques. The best intervals for a specific project depend on the material properties of the construct and the relevant biological processes.
After the construct culturing periods, researchers perform extensive analyses on the overall behavior of the cells. In some cases they analyze the post-culture physical properties of the constructs as well. For biological and materials projects, this analysis process renders conclusions about the hypothesis. If everything went well (here’s hoping!) these conclusions will demonstrate novelty and be the basis of a scholarly paper or intellectual property. Application projects will also include phase C experiments. However, it is possible that these will also be more diligence than discovery in such projects.
Goals of Phase D:
- Demonstrate any novelty crucial to the project that hasn’t been proven yet.
- Many projects will also include in vivo studies.
Not all projects need to continue into phase D, although many exciting ones do! Phase D includes difficult experiments that go above and beyond those performed as proof of concept in phase C, or those from previous literature. Often, this means moving from the controlled in vitro setting to the more complex but more meaningful in vivo setting. Results such as how a construct changes after implantation or how an organism’s body reacts to it are often examined. There are great ethical responsibilities whenever working with living organisms. As such approval from an Institutional Review Board (IRB) is a key part of any animal research in phase D. Beyond the ethics of the experimentation, researchers also consider how to demonstrate the general findings from phase C in a more meaningful way. Similarly, the post experiment analyses often mirror those used in phase C.
It’s important to keep in mind that this should act as a framework to reference as you get started. Most projects don’t fit neatly in one archetype. You will probably need to repeat sections as you run into obstacles. As with any hard science, it’s important to read and use the existing literature to inform your application of this framework for your project. We hope that this article has given you the basics you need to start that reading and planning. If you have any questions, feel free to contact the Allevi Customer Success Team!
